Introduction
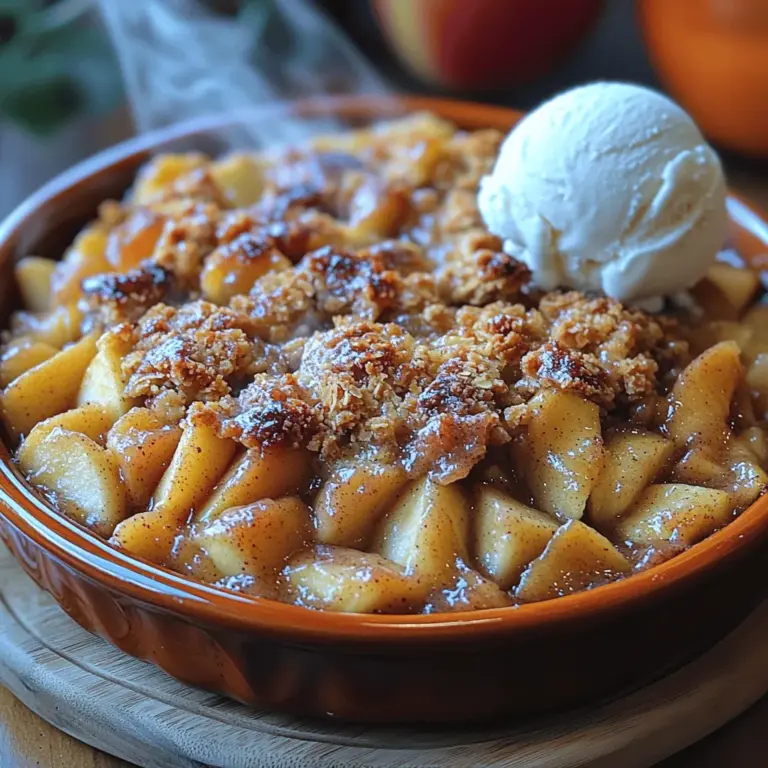
When it comes to classic desserts, few can rival the heartwarming appeal of an apple crumble. This delightful dish combines the tartness of apples with a sweet, crunchy topping, making it a perennial favorite during the cooler months. Its comforting aroma wafts through homes, inviting families and friends to gather around the dinner table and indulge in a slice of warmth. Whether served with a scoop of vanilla ice cream or a dollop of freshly whipped cream, apple crumble embodies the essence of homemade desserts—simple, satisfying, and utterly delicious.
As the seasons change and apples come into their prime, there’s no better time to embrace the art of baking. The Delectable Apple Crumble Bliss recipe stands out not only for its exquisite taste but also for its simplicity, making it a must-try for both novice bakers and seasoned chefs. This recipe is designed to guide you through each step, ensuring that you create a dish that impresses and brings joy to your loved ones.
Understanding the Ingredients
The Star Ingredient: Granny Smith Apples
At the heart of this delightful apple crumble lies the star ingredient: Granny Smith apples. Renowned for their vibrant green skin and crisp texture, Granny Smith apples are celebrated for their perfect balance of tartness and firmness. Their natural acidity cuts through the sweetness of the crumble, providing a refreshing contrast that elevates the entire dessert.
When selecting apples for this recipe, look for firm fruits with a bright, unblemished skin. Granny Smith apples not only hold their shape during baking but also develop a wonderful flavor profile that enhances the overall dish. Beyond their taste, these apples are packed with nutritional benefits. Rich in fiber, vitamin C, and antioxidants, they contribute to a wholesome dessert option that can be enjoyed guilt-free.
The Filling Ingredients
The filling for the apple crumble is where the magic begins. In addition to the Granny Smith apples, you’ll need a selection of simple yet impactful ingredients:
– Sugar: Both granulated and brown sugar can be used to sweeten the filling. Granulated sugar enhances the natural sweetness of the apples, while brown sugar adds a hint of caramel flavor.
– Cinnamon: This warm spice infuses the filling with depth and a cozy aroma, making it synonymous with comfort food.
– Nutmeg: A pinch of nutmeg complements the cinnamon, adding a subtle warmth that rounds out the flavors.
– Lemon juice: The acidity of lemon juice brightens the apple filling and prevents the apples from browning too quickly.
– Vanilla extract: This ingredient enhances the overall flavor profile, contributing a fragrant sweetness that harmonizes beautifully with the apples.
– Flour: A small amount of flour is added to the filling to help thicken the juices released from the apples as they bake, creating a luscious, cohesive filling.
Each of these ingredients plays a vital role in enhancing the flavor and texture of the apple filling, resulting in a delightful balance of sweet and tart notes.
The Crumble Topping Ingredients
The crowning glory of this apple crumble is the crunchy topping, which provides the perfect contrast to the soft, tender apple filling. The crumble topping consists of:
– Oats: Rolled oats add a hearty texture and chewiness to the topping, making each bite satisfying.
– Brown sugar: The molasses content in brown sugar not only sweetens the topping but also contributes to its rich flavor and golden color.
– Butter: Unsalted butter is essential for binding the topping ingredients together while adding a rich, buttery flavor that enhances the overall experience.
– Optional nuts: Chopped nuts, such as walnuts or pecans, can be added for an extra layer of crunch and flavor. They complement the oats and provide a delightful contrast in texture.
Together, these ingredients create a crunchy, golden topping that perfectly complements the tender apple filling, resulting in a dessert that’s sure to please.
Preparation Steps for Apple Filling
Creating the apple filling is a straightforward process that sets the foundation for your apple crumble. Follow these detailed steps to prepare this flavorful mixture:
1. Peeling, Coring, and Slicing Apples: Start by peeling the Granny Smith apples using a vegetable peeler. Next, cut the apples in half, remove the core, and slice them into thin wedges. Aim for uniform slices, as this ensures even cooking. A good rule of thumb is to slice the apples about 1/4 inch thick, allowing them to cook down nicely without becoming mushy.
2. Mixing the Ingredients: In a large mixing bowl, combine the sliced apples with the sugar, cinnamon, nutmeg, lemon juice, vanilla extract, and flour. Use a spatula or your hands to gently toss the ingredients together until the apple slices are evenly coated. This step not only enhances the flavor but also ensures that the apples are well-seasoned.
3. Choosing the Best Apples: While Granny Smith apples are the preferred choice for this recipe, feel free to experiment with other apple varieties. Combining different types, such as Honeycrisp or Braeburn, can create a more complex flavor profile. Just make sure to choose apples that hold up well during baking to maintain the desired texture.
4. Adding Flour: The inclusion of flour in the apple mixture is crucial as it helps to thicken the juices released during baking. This step will prevent the filling from becoming too watery, ensuring a perfect consistency. Adding just the right amount of flour allows the apples to release their natural juices while creating a deliciously thick filling.
Creating the Perfect Crumble Topping
Now that your apple filling is prepared, it’s time to focus on the crumble topping. Follow these step-by-step instructions to achieve a perfectly crumbly texture:
1. Measuring Ingredients Accurately: Begin by measuring your oats, brown sugar, and flour. Accurate measurements are essential for achieving the right balance of flavors and textures. Use a kitchen scale for precision or standard measuring cups.
2. Mixing the Dry Ingredients: In a medium-sized bowl, combine the rolled oats, brown sugar, flour, and a pinch of salt. Stir the dry ingredients together until they are well combined. This will ensure an even distribution of flavors throughout the topping.
3. Incorporating Butter: Cut the unsalted butter into small cubes and add it to the dry mixture. Using your fingers or a pastry cutter, work the butter into the dry ingredients until the mixture resembles coarse crumbs. Take care not to overwork the mixture; you want to see small chunks of butter throughout to achieve that desired crunch.
4. Optional Nuts: If you choose to add nuts, now is the time. Fold in the chopped nuts gently, ensuring they are distributed evenly throughout the topping. This step adds extra flavor and texture, making your crumble topping even more delightful.
5. Achieving the Desired Texture: The key to a successful crumble topping lies in the texture. You want it to be crumbly but not too dry. If it feels too dry, you can add a little more melted butter to bind the mixture. Conversely, if it feels too wet, sprinkle in a bit more flour or oats until you reach the desired consistency.
With these steps, you’re well on your way to creating a Delectable Apple Crumble Bliss that will be the highlight of any gathering. The combination of tender apples and a crunchy topping is a classic that never fails to impress, making it a go-to recipe for any occasion. Stay tuned for the next steps in assembling and baking your masterpiece!
Optional Addition of Nuts: Enhancing the Dish
When it comes to apple crumble, the classic recipe is always a hit, but an optional addition of nuts can elevate this dish to another level. Nuts such as walnuts, pecans, or almonds add a delightful crunch and a depth of flavor that complements the soft, warm apples and the crumbly topping. Not only do they enhance the texture, but they also provide healthy fats, protein, and essential nutrients, making your dessert a little more wholesome.
If you choose to incorporate nuts, consider roughly chopping them to ensure they mix well with the crumble topping without overwhelming the dish. A handful of nuts added to the crumble mixture or sprinkled on top before baking can create a beautiful contrast in both flavor and texture.
Assembling the Apple Crumble
Instructions for Layering the Filling and Crumble Topping
Now that your apple filling is prepared, it’s time to assemble your Delectable Apple Crumble Bliss. Start by preheating your oven to 350°F (175°C). Preheating is a vital step to ensure that your crumble bakes evenly, resulting in the perfect golden-brown topping and tender apples.
Begin by evenly distributing the apple filling across the bottom of your prepared baking dish. Use a spatula to gently spread the apples into an even layer. This step is crucial as it ensures that every bite of your apple crumble will have a delicious combination of fruit and topping.
Next, take your crumble mixture and sprinkle it generously over the apples. Use your hands to crumble the topping over the filling, making sure to cover all the apples. This helps to create a barrier that locks in moisture while allowing the topping to crisp up nicely during baking.
For best results, ensure that the crumble is distributed evenly. You can use a fork to fluff the topping slightly, which will help create a light and airy texture. If you’re adding nuts, now is the time to sprinkle them over the top of the crumble mixture, ensuring they are well-distributed.
Importance of Preheating the Oven and the Baking Process
Once your crumble is assembled, place it in the preheated oven. The baking process is crucial for developing the flavors and textures of your dish. As the crumble bakes, the heat will transform the raw ingredients into a bubbling, golden dessert. The apples will soften and release their juices, creating a luscious filling that is perfectly complemented by the crunchy topping.
The temperature of your oven plays a significant role in the final texture of the crumble. If your oven is too hot, the topping may burn before the apples have a chance to cook through. Conversely, if the temperature is too low, the crumble may not achieve that desirable crispiness. For optimal results, maintain the oven temperature at 350°F (175°C) throughout the baking process.
Baking Process and Timing
Explanation of the Baking Process
As the apple crumble bakes, the kitchen fills with an irresistible aroma, hinting at the delicious dessert that awaits. Bake your crumble for 30-40 minutes, but keep an eye on it as it nears the end of the baking time. You are looking for a golden-brown topping that is both firm and slightly crispy.
Importance of Baking Until Golden Brown and Bubbly
The key to perfect doneness is watching for that golden-brown hue and the bubbling of the filling. The golden color indicates that the sugars in the topping have caramelized, creating a sweet and rich flavor. Meanwhile, the bubbling filling is a sign that the apples are softening and the juices are melding into a delicious sauce.
Tips on Checking for Doneness Without Disturbing the Topping
To check for doneness, gently shake the baking dish. If the filling is bubbling and the topping is firm but yielding slightly, then your apple crumble is ready to come out of the oven. Avoid inserting a toothpick or knife into the topping, as this may disrupt the crispy layer you have worked hard to create.
Serving Suggestions
Once your Delectable Apple Crumble Bliss has cooled slightly, it’s time to serve up this delightful dessert. Here are some presentation ideas to make your dish truly shine:
1. Presentation Ideas for Serving the Apple Crumble: Serve your apple crumble in the baking dish for a rustic look, or transfer individual portions to small ramekins for a more elegant presentation. Garnish with a sprinkle of cinnamon or a few fresh apple slices for an appealing touch.
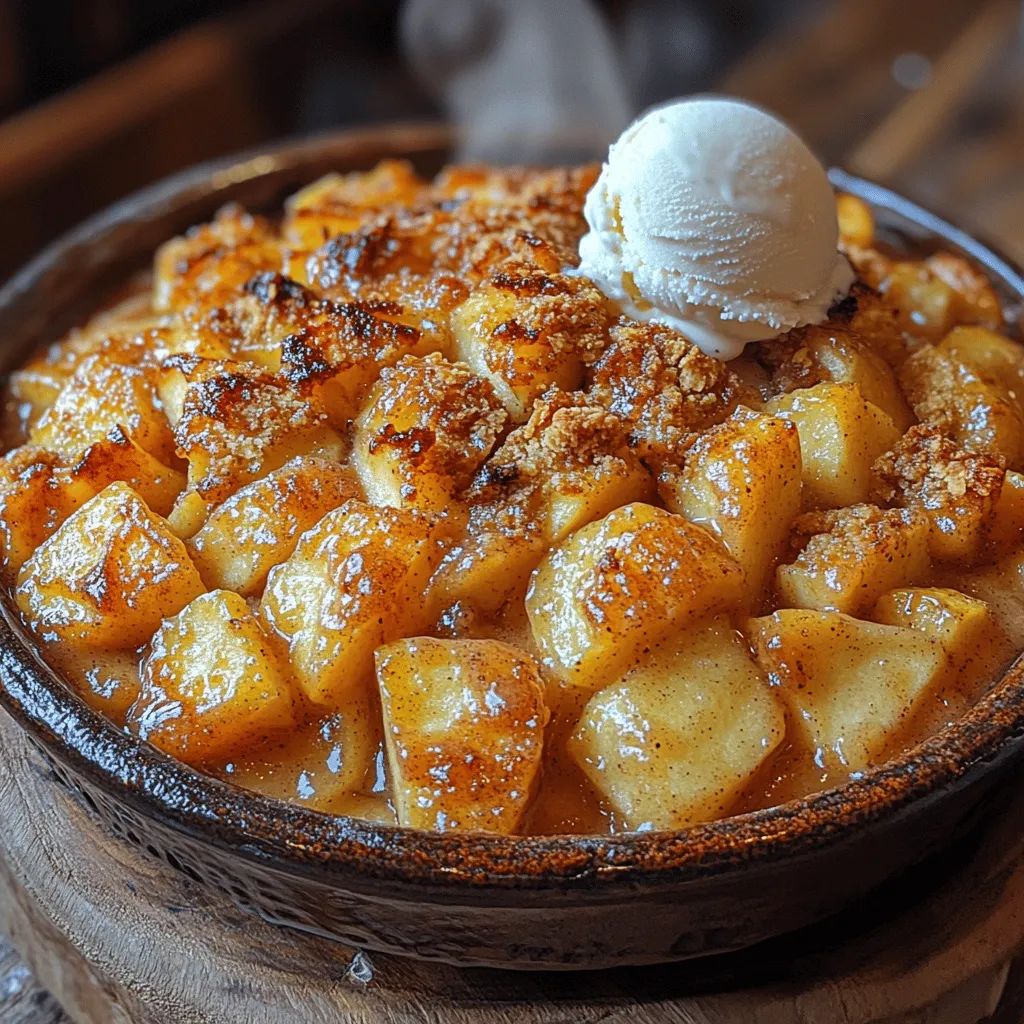
2. Pairing with Vanilla Ice Cream or Whipped Cream: A warm apple crumble is perfectly complemented by a scoop of vanilla ice cream or a dollop of whipped cream. The creamy texture and cool temperature contrast beautifully with the warm, spiced apples and crunchy topping.
3. Creative Serving Options for Special Occasions: For special gatherings or holidays, consider serving your apple crumble with a homemade caramel drizzle or a sprinkle of crushed nuts on top. You might also pair it with a spiced cider or a glass of dessert wine to enhance the flavors.
4. Benefits of Serving Warm Versus Cooled: While apple crumble is delicious warm, it can also be enjoyed at room temperature. Serving it warm allows the flavors to shine and the topping to maintain its crispness, while cooled versions may have a softer texture but are easier to slice and serve in portions.
Nutritional Information
Understanding the nutritional profile of your Delectable Apple Crumble Bliss can enhance your appreciation of this dessert. A typical serving contains approximately 250-300 calories, depending on the ingredients used and portion size.
Overview of the Nutritional Profile
– Calories: 250-300 per serving
– Carbohydrates: 40-50g (from apples and sugars)
– Fats: 10-15g (depending on butter and nuts used)
– Protein: 2-5g (primarily from nuts and oats)
This dish offers the benefits of apples, which are rich in dietary fiber, vitamin C, and various antioxidants. The oats and nuts add additional fiber and healthy fats, making this dessert a more nutritious option compared to many others.
Discussion on How to Make Healthier Substitutions
If you’re looking to lighten the recipe, consider substituting some or all of the butter with coconut oil or using a sugar substitute like maple syrup or honey. You can also reduce the amount of sugar in the filling by using sweeter apples or adding spices like cinnamon or nutmeg to enhance flavor without added sweetness.
Conclusion
Baking the Delectable Apple Crumble Bliss is not only a rewarding experience but also a joyous opportunity to share comfort and warmth with those around you. The act of preparing this classic dessert brings back memories of family gatherings, autumn evenings, and the simple pleasure of homemade treats.
As you savor each bite, remember that baking is as much about the process as it is about the end result. Encourage your friends and family to join you in the kitchen, and enjoy the laughter and love that comes from creating something special together.
Apple crumble has a timeless appeal that transcends generations, making it a beloved dessert for any occasion. Whether served at a holiday feast or as a cozy weeknight treat, this delectable dish will undoubtedly bring people together, creating memories that last long after the last crumb has been enjoyed. So gather your ingredients, preheat your oven, and indulge in the delightful art of baking.
