Introduction
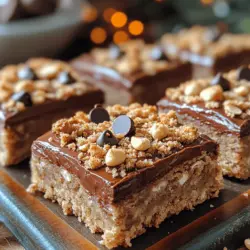
If you have a sweet tooth and a love for chocolate, then Nutella Bliss Crumb Bars are about to become your new favorite indulgence. These bars blend the rich, creamy goodness of Nutella with a buttery, crumbly texture to create a dessert that is both satisfying and utterly delicious. Imagine biting into layers of sweet chocolate hazelnut goodness, perfectly complemented by a delightful crumb topping. Whether you’re hosting a casual get-together, celebrating a birthday, or simply looking to satisfy your cravings, these crumb bars serve as the perfect treat for any occasion.
The appeal of Nutella Bliss Crumb Bars lies not only in their luxurious flavor but also in their versatility. They can be served warm, straight from the oven, allowing the Nutella to ooze enticingly, or cooled for a firmer texture that’s easy to slice into perfect squares. Pair them with a scoop of vanilla ice cream for an extra indulgence or enjoy them alongside a cup of coffee for a delightful afternoon pick-me-up. No matter how you choose to enjoy these bars, their rich chocolate hazelnut flavor will leave you and your guests coming back for more.
In this article, we will walk you through the process of creating these irresistible Nutella Bliss Crumb Bars, starting from understanding the key ingredients to preparing your workspace and crafting the perfect crumb mixture.
Understanding the Ingredients
Before diving into the baking process, it’s essential to understand the role of each ingredient that contributes to the deliciousness of Nutella Bliss Crumb Bars. Here’s a breakdown of the key components that make these bars so special:
Flour: Importance in Structure and Texture
Flour is the backbone of any baked good, and in Nutella Bliss Crumb Bars, it plays a critical role in providing structure. All-purpose flour is typically used, giving the bars their sturdy base and crumbly texture. When combined with other ingredients, flour helps to bind everything together while also contributing to the overall texture. The right amount of flour will ensure that the crumb bars are neither too dense nor too crumbly, striking that perfect balance for an enjoyable bite.
Rolled Oats: Adding Heartiness and Nutrition
Incorporating rolled oats into the mixture adds a delightful heartiness to the bars. Oats not only provide a chewy texture that complements the rich Nutella but also enhance the nutritional value of the dessert. They are a great source of dietary fiber, which can help keep you feeling full longer. Additionally, oats contribute a subtle nutty flavor that pairs beautifully with chocolate and hazelnut, making each bite more satisfying.
Sugars: Role in Sweetness and Moisture
Both granulated sugar and brown sugar play pivotal roles in the sweetness and moisture of the Nutella Bliss Crumb Bars. Granulated sugar adds sweetness and helps create a crisp texture in the crumb topping, while brown sugar introduces moisture and a hint of caramel flavor. The combination of these two sugars results in a well-rounded sweetness that balances the richness of the Nutella, ensuring that the bars are indulgent without being overwhelmingly sweet.
Baking Powder: Function in Rising and Lightness
Baking powder is a crucial leavening agent that helps the crumb mixture rise during baking. It creates air pockets that contribute to a lighter, more delicate texture in the bars. While Nutella Bliss Crumb Bars are primarily crumbly, a little lift from baking powder ensures they don’t turn out too dense. Properly incorporating this ingredient is vital to achieving that melt-in-your-mouth quality.
Butter: Impact on Flavor and Richness
Butter is often considered the secret ingredient that elevates baked treats. In Nutella Bliss Crumb Bars, it adds richness, flavor, and moisture. The use of unsalted butter allows for greater control over the overall saltiness of the dessert, ensuring that the sweet and nutty flavors of Nutella shine through. When the butter is creamed with sugars, it creates a light and airy mixture that is key to the crumb’s texture.
Nutella: The Star Ingredient and Its Flavor Profile
No recipe for Nutella Bliss Crumb Bars would be complete without Nutella itself—the star of the show. This iconic chocolate hazelnut spread brings an unmistakable creamy texture and rich flavor to the bars. The combination of chocolate, hazelnuts, and a hint of vanilla creates a decadent experience with each bite. It’s essential to use high-quality Nutella to ensure that the flavor truly shines through, making your bars an unforgettable treat.
Optional Add-Ins: Hazelnuts and Chocolate Chips for Texture and Flavor Enhancement
While Nutella is delicious on its own, you can elevate the flavor and texture of your crumb bars by considering optional add-ins. Chopped hazelnuts can be folded into the mixture, providing a lovely crunch that enhances the nutty flavor of the Nutella. Additionally, chocolate chips can be sprinkled throughout the bars for an extra touch of chocolatey goodness. These add-ins are entirely optional but can take your Nutella Bliss Crumb Bars to the next level.
Step-by-Step Guide to Preparing Nutella Bliss Crumb Bars
Now that we’ve covered the essential ingredients that make Nutella Bliss Crumb Bars so delectable, let’s move on to the initial steps of preparing this scrumptious treat.
Preparing Your Workspace
Before you begin baking, take a moment to organize your ingredients and tools. A well-prepared workspace can make the baking process smoother and more enjoyable. Gather your ingredients, measuring cups, mixing bowls, and a baking dish. It’s advisable to have everything within reach so that you can focus on the task at hand without unnecessary interruptions.
Tips for Organizing Ingredients and Tools
1. Measure Ahead: Measure out your flour, oats, sugars, and any other dry ingredients before you start mixing. This practice not only saves time but also ensures accuracy in your measurements.
2. Choose the Right Dish: A 9×9-inch or 8×8-inch square baking dish works best for this recipe. Make sure to grease the dish or line it with parchment paper for easy removal after baking.
3. Gather Mixing Tools: Have a hand mixer or stand mixer ready for creaming the butter and sugars. Additionally, a spatula or wooden spoon will be handy for folding in dry ingredients and the Nutella.
Importance of Measuring Accurately for Best Results
Precision in measuring your ingredients is crucial for successful baking. Baking is a science, and the right proportions of ingredients can make or break your Nutella Bliss Crumb Bars. Avoid packing flour too tightly into your measuring cup, as this can lead to dry bars. Instead, spoon the flour into the cup and level it off with a straight edge. For sugars and other ingredients, use the appropriate measuring tools to ensure accuracy.
Preheating the Oven: Setting the Stage
Once your workspace is organized, it’s time to preheat your oven. Preheating is a vital step that ensures your crumb bars bake evenly and thoroughly. When you place your mixture into a preheated oven, it begins to rise immediately, creating that desirable texture.
Optimal Oven Temperature for Baking Crumb Bars
For Nutella Bliss Crumb Bars, set your oven to 350°F (175°C). This temperature is ideal for achieving a golden-brown crumb topping while ensuring that the Nutella filling heats through without burning. Allow the oven to fully preheat before placing your baking dish inside, as this will help achieve the best results.
Crafting the Perfect Crumb Mixture
With your workspace prepared and the oven preheated, it’s time to create the crumb mixture that will form the base and topping of your Nutella Bliss Crumb Bars.
Combining Dry Ingredients Effectively
In a large mixing bowl, start by whisking together the all-purpose flour, rolled oats, sugars, and baking powder. Ensure these dry ingredients are well-combined to promote an even distribution of sweetness and texture throughout the crumb mixture. This step is crucial for achieving a uniform layer in your bars.
Importance of Texture in Achieving Crumbly Layers
As you mix the dry ingredients, it’s essential to consider the texture of your crumb mixture. You want it to be slightly coarse, which will contribute to the delightful crumbly layers. When you incorporate the wet ingredients later, this texture will help create the perfect contrast between the soft Nutella filling and the crunchy crumb topping.
Incorporating Wet Ingredients for a Rich Base
After combining the dry ingredients, it’s time to add the wet ingredients, which include softened butter and any additional flavoring, such as vanilla extract. Cream the butter and sugars together until the mixture is light and fluffy. This aeration is crucial for achieving a light texture in the baked bars.
Once the butter and sugars are well combined, fold in the dry mixture until just combined. Be careful not to overmix; you want to maintain the crumbly texture that defines these bars. The result should be a cohesive mixture that holds together when pressed but remains crumbly enough to create that signature topping.
As you prepare to layer the Nutella into the mixture, your kitchen will begin to fill with the enticing aroma of chocolate and hazelnut, setting the stage for a delightful baking experience. In the next part, we will continue with the layering process and baking instructions for your Nutella Bliss Crumb Bars. Prepare for the delicious indulgence that awaits!
Techniques for Mixing Butter and Vanilla into Dry Ingredients
When preparing the Nutella Bliss Crumb Bars, the initial mixing of butter and vanilla into your dry ingredients is a critical step that sets the foundation for the bars’ texture and flavor. Start with room-temperature butter, which allows for easier incorporation into the dry mix. Using a pastry cutter or your fingertips, blend the butter into the flour and sugar until the mixture resembles coarse crumbs. This method ensures that the butter is evenly distributed, creating a rich, buttery flavor throughout the crust.
Once the butter is properly mixed in, add the vanilla extract. It’s best to drizzle the vanilla over the crumbly mixture rather than directly dumping it in. This technique helps in evenly dispersing the flavor, enhancing the overall taste of your crumb bars. Use a spatula or wooden spoon to gently fold the mixture together until the vanilla is fully incorporated.
Visual Cues for the Right Consistency of the Mixture
As you mix, pay attention to the texture of your crumb mixture. The goal is to achieve a sandy, crumbly consistency that holds together when pinched. If the mixture feels too dry, you can add a tablespoon of cold water to help bind it. Conversely, if it becomes too wet or sticky, consider adding a bit more flour. The right consistency is key to ensuring that your bars hold their shape once baked.
Creating a Solid Crust: Pressing the Base
Once your crumb mixture is ready, it’s time to create a solid crust. Transfer about two-thirds of the mixture into a greased and lined baking pan. Using your hands or the back of a measuring cup, press the mixture firmly and evenly into the bottom of the pan. This step is crucial; a well-pressed crust forms a sturdy base that can support the layers above it.
Importance of Evenly Pressing the Mixture into the Pan
Even pressure is essential for the crust to bake uniformly. If some areas are more densely packed than others, you may end up with uneven baking, resulting in a base that is either too hard or too crumbly. Aim for a thickness of about ¼ to ½ inch, ensuring that the entire surface is smooth and flat.
Tips for Achieving a Uniform Base Layer
To achieve a uniform base layer, consider using a measuring cup or a flat spatula to press down the mixture evenly. Start from the center of the pan and work your way outwards, applying consistent pressure. This method not only helps in achieving an even thickness but also ensures that the mixture adheres well to the pan, preventing separation during baking.
Spreading the Nutella: Techniques for Even Distribution
Once the crust is pressed into the pan, it’s time to add the Nutella layer. For easy spreading, warm the Nutella slightly in the microwave for about 10-15 seconds. This softens the hazelnut spread, making it much easier to spread evenly across the crust.
Ensuring Every Bite Has a Taste of Nutella
To ensure every bite is filled with the rich, creamy goodness of Nutella, use an offset spatula or the back of a spoon to spread it out evenly. Start from the center and work your way to the edges, making sure to cover the entire surface. Don’t be shy—adding a generous layer of Nutella will enhance the overall flavor profile of your bars.
Enhancing Flavor with Hazelnuts and Chocolate Chips
To elevate the Nutella Bliss Crumb Bars further, consider incorporating optional ingredients such as chopped hazelnuts and chocolate chips. These additions not only enhance the flavor but also add delightful texture. Hazelnuts provide a satisfying crunch, complementing the creamy Nutella, while chocolate chips introduce pockets of melted chocolate throughout the bars.
Discussing Optional Ingredients and Their Contributions
When adding optional ingredients, balance is key. Too many nuts or chocolate chips can overwhelm the bars, while too few might not provide the desired flavor complexity. A good rule of thumb is to aim for about ½ cup of hazelnuts and chocolate chips combined. This will complement the Nutella without overpowering it, creating a harmonious blend of flavors in each bite.
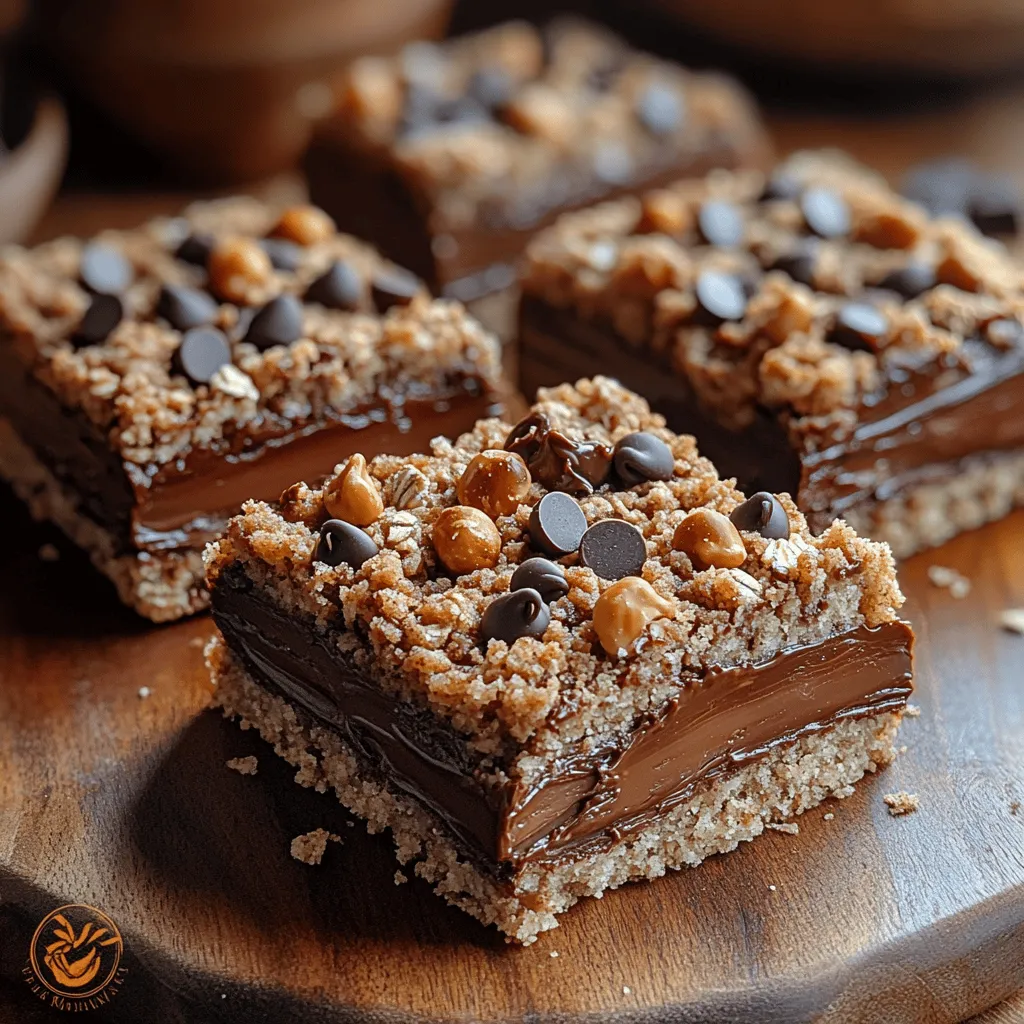
Balance of Flavors and Textures
The combination of buttery crust, creamy Nutella, and crunchy hazelnuts or chocolate chips creates a delightful contrast of flavors and textures. The sweetness of the Nutella is perfectly balanced by the nutty flavor of hazelnuts, while the chocolate adds richness, resulting in a well-rounded dessert that pleases the palate.
Topping Off with Crumb Mixture
After spreading the Nutella layer, it’s time to finish off the bars with the remaining crumb mixture. Sprinkle it evenly over the Nutella, ensuring that it covers the entire surface. This layer not only adds texture but also creates a delightful topping that contrasts with the creamy center.
Importance of Covering Nutella Completely
Covering the Nutella completely with crumb mixture is crucial for preventing it from bubbling up during baking. If the Nutella is exposed, it can burn or create an unpleasant texture. A complete layer of crumbs ensures that the filling is protected, resulting in perfectly baked bars.
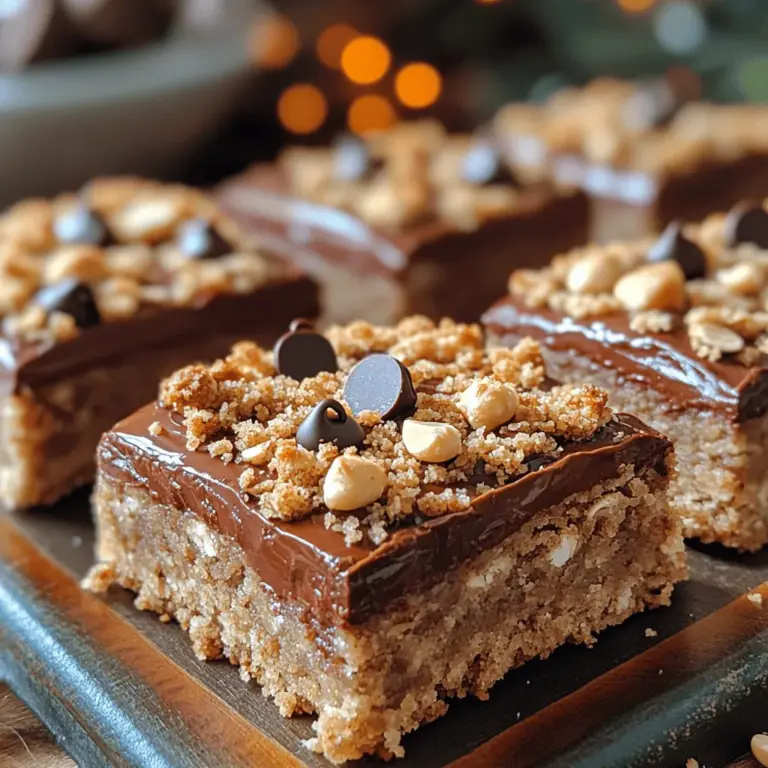
Visual and Textural Appeal of the Final Layer
As you sprinkle the crumb mixture, take a moment to appreciate the visual appeal of your creation. The contrast between the light-colored crumbs and the dark Nutella creates an enticing look that will have everyone eager to dig in. The texture of the top layer should be crumbly yet cohesive, giving a hint of what’s to come.
Baking to Perfection
Preheat your oven to 350°F (175°C) before placing the pan inside. Bake the Nutella Bliss Crumb Bars for approximately 25-30 minutes.
Signs of Doneness: What to Look For in Color and Texture
To check for doneness, observe the color of the crumb topping. It should turn a golden brown, and you’ll notice the edges pulling slightly away from the pan. Additionally, a gentle press on the center should yield a slight firmness; if it feels too soft, give it an additional few minutes in the oven.
Importance of Cooling Time for Cutting
Once baked, remove the pan from the oven and allow it to cool in the pan for about 10-15 minutes. This cooling period is essential, as it allows the bars to set, making them easier to cut into squares or rectangles. If you try to cut them while they’re still warm, you risk a messy situation with crumbling bars.
Storing and Serving Suggestions
Best Practices for Storing Nutella Bliss Crumb Bars
To maintain the freshness of your Nutella Bliss Crumb Bars, store them in an airtight container. If you live in a warm climate, consider refrigerating them to prevent the Nutella from becoming too soft. Alternatively, if you prefer a more gooey texture, keep them at room temperature for a few hours before serving.
Tips for Maintaining Freshness
For optimal freshness, consume the bars within a week. If you plan to keep them longer, consider freezing them. To freeze, cut the bars into portions and wrap each piece in plastic wrap, then place them in a freezer-safe bag. When you want to enjoy them, simply thaw them in the fridge or at room temperature.
Serving Ideas: Pairing with Beverages and Presentation Methods
When it comes to serving your Nutella Bliss Crumb Bars, consider pairing them with beverages that complement their rich flavor. A glass of cold milk or a warm cup of coffee works beautifully. For a more indulgent treat, top the bars with a dollop of whipped cream or a scoop of vanilla ice cream.
Suggestions for Garnishes or Accompaniments
For an extra touch, drizzle some melted chocolate or caramel sauce over the bars before serving. You can also sprinkle a few chopped hazelnuts on top for added crunch and visual appeal. These simple garnishes can elevate your dessert presentation, making it perfect for gatherings or special occasions.
Conclusion
In summary, Nutella Bliss Crumb Bars are a delightful, easy-to-make dessert that offers a perfect balance of flavors and textures. The buttery crust, creamy Nutella, and optional crunchy hazelnuts create a treat everyone will love. Sharing these bars with friends and family will surely spread joy and indulgence in every bite.
Don’t hesitate to experiment with variations, whether swapping in different nut spreads, adding fruits, or adjusting the chocolate content to suit your preferences. The beauty of this recipe lies in its versatility, and your creativity can make it uniquely yours. So gather your ingredients, roll up your sleeves, and enjoy making these delicious bars that are bound to become a favorite in your home!