Delicious Mini Chicken Cordon Bleu Sliders: A Perfect Party Treat
Introduction
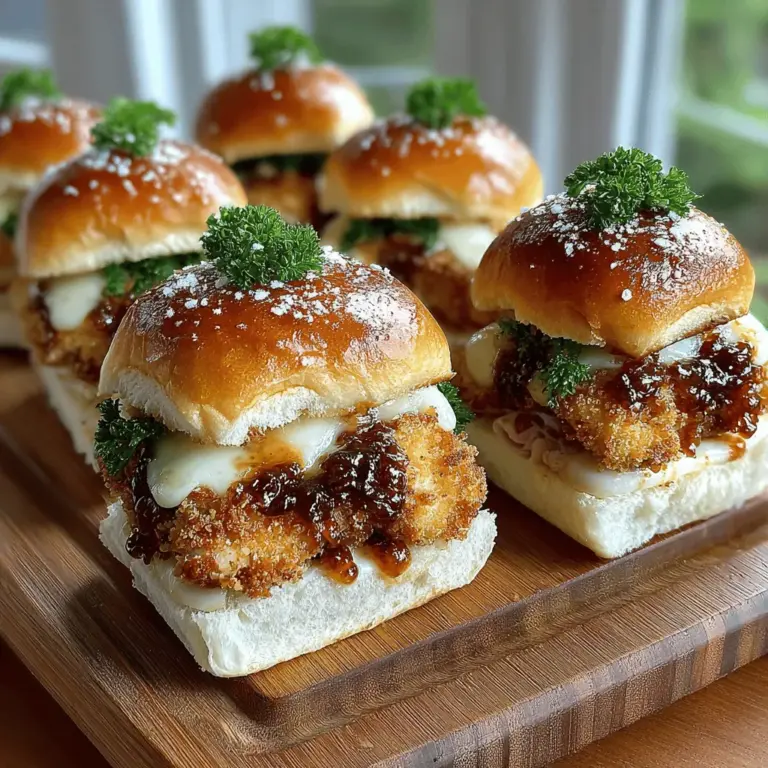
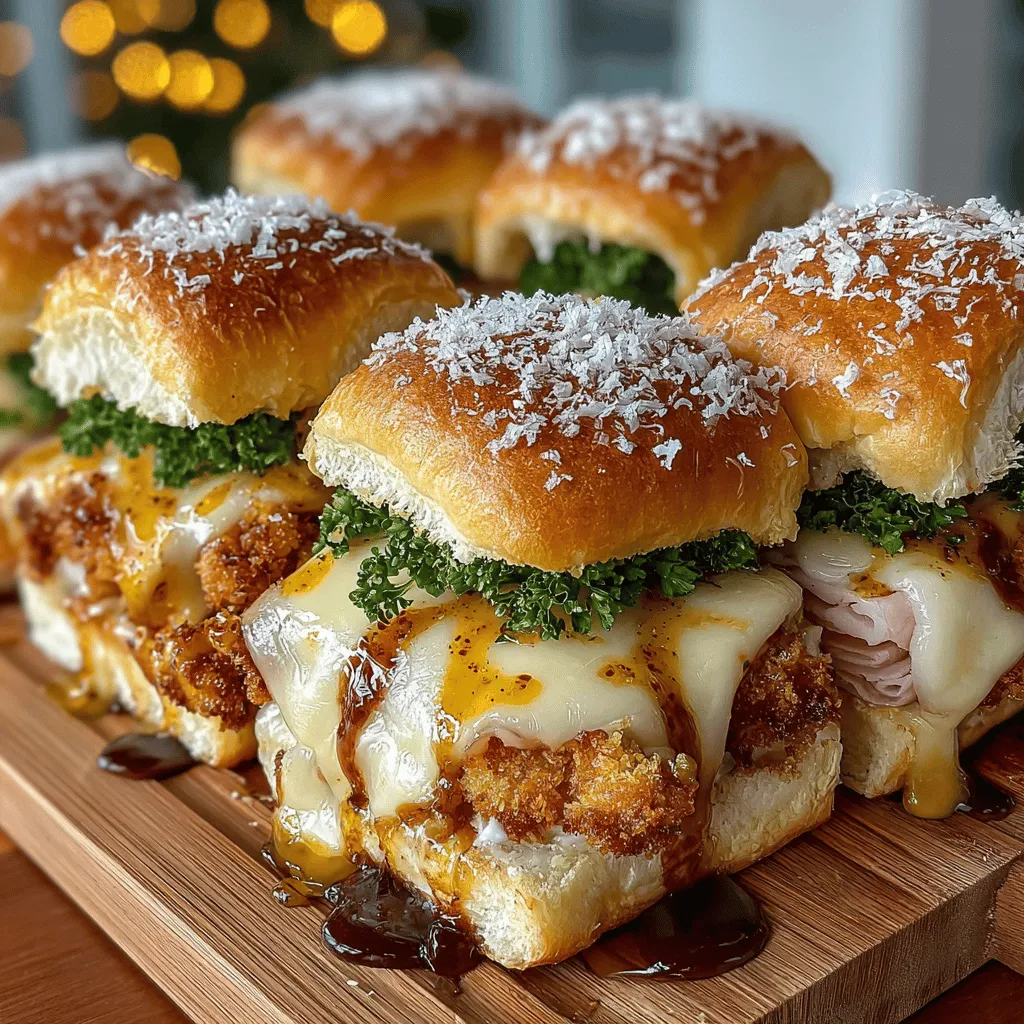
Mini Chicken Cordon Bleu Sliders are the epitome of culinary comfort food, offering a delightful twist on the classic French dish. These bite-sized creations combine tender, juicy chicken breast with savory ham and gooey Swiss cheese, all enveloped in a crispy, golden crust. Perfect for gatherings, these sliders not only satisfy your cravings but also impress your guests with their gourmet flair.
Sliders have gained immense popularity in recent years, becoming a staple at parties, picnics, and casual get-togethers. Their small size makes them ideal for social events, allowing guests to sample a variety of flavors without committing to a full meal. Mini Chicken Cordon Bleu Sliders take this trend to the next level, seamlessly blending the rich flavors of a beloved dish into a convenient, handheld format.
As you prepare to dive into this recipe, you’ll discover that it strikes a perfect balance between comfort and sophistication, making it a go-to choice for any occasion. Whether you’re hosting a family reunion or planning a game day feast, these sliders are sure to be a hit.
Understanding the Ingredients
Chicken Breast
The cornerstone of any great slider is, of course, the chicken breast. For this recipe, using thinly sliced chicken is essential. Not only does it cook quickly, but it also allows for easier assembly and ensures that each bite is packed with flavor. Chicken breast is not only versatile but also serves as an excellent source of lean protein, making it a healthier option for your gathering.
When selecting chicken breast, opt for fresh, high-quality cuts to ensure maximum tenderness and juiciness. If you’re short on time, purchasing pre-sliced chicken can also save you some prep work. However, if you prefer to slice the chicken yourself, use a sharp knife and consider freezing the breast slightly for about 30 minutes before slicing. This will make the process much easier and yield more uniform pieces.
Ham and Swiss Cheese
The combination of ham and Swiss cheese is a hallmark of the classic Cordon Bleu recipe, and it plays a pivotal role in the flavor profile of these sliders. For this recipe, smoked ham is particularly recommended for its rich, savory notes that perfectly complement the mildness of Swiss cheese. The creamy texture of melted Swiss cheese adds an indulgent element, binding the sliders together and enhancing their overall taste.
When selecting your ham, look for high-quality deli-style options that are free from artificial preservatives and fillers. For the Swiss cheese, fresh slices from the deli counter will provide the best meltability and flavor, ensuring that each slider has that gooey, cheesy goodness that everyone loves.
Breading and Frying
To achieve the perfect crunch on your sliders, the breading process is crucial. For this recipe, Panko breadcrumbs are the preferred choice. Unlike traditional breadcrumbs, Panko is lighter and flakier, which provides an exceptional crunch when fried. This texture contrast adds an appealing element to the sliders and enhances the overall eating experience.
The dredging process involves coating the chicken in a seasoned flour mixture, followed by dipping it in egg and finally rolling it in Panko breadcrumbs. This three-step method not only contributes to the crunchy exterior but also helps seal in the moisture of the chicken during frying, resulting in a juicy and flavorful slider.
Seasonings
The role of seasonings cannot be overlooked when it comes to elevating the flavors of your Mini Chicken Cordon Bleu Sliders. A blend of garlic powder, onion powder, and paprika adds depth to the dish, enhancing the natural flavors of the chicken and the richness of the ham and cheese. Each seasoning contributes its unique profile, creating a harmonious flavor experience.
When seasoning your sliders, feel free to adjust the quantities to suit your personal taste. If you prefer a spicier kick, consider adding a pinch of cayenne pepper or some freshly cracked black pepper. The beauty of this recipe lies in its versatility, allowing you to tailor it to your preferences while still maintaining the essence of the classic dish.
Step-by-Step Recipe Breakdown
Preparation of the Chicken
Now that we’ve covered the ingredients, it’s time to prepare the chicken for your sliders. Start by seasoning your thinly sliced chicken breasts with a combination of salt, pepper, garlic powder, onion powder, and paprika. This initial seasoning step is vital for infusing the chicken with flavor from the inside out.
Next, take a slice of ham and a slice of Swiss cheese and place them on one piece of seasoned chicken. Carefully fold the chicken over the filling, creating a neat pocket. For a secure seal, you can use toothpicks to hold the chicken in place, but be sure to remove them before serving.
As you assemble your sliders, keep a close eye on the size of the chicken pieces. They should be small enough to fit comfortably in your slider buns while still being substantial enough to deliver that satisfying bite. A visual cue is to aim for chicken pieces that are roughly the same size as your slider buns.
Setting Up the Dredging Station
Creating an organized dredging station is essential for a smooth cooking process. Set up three shallow dishes in a line: one filled with seasoned flour, another with beaten eggs, and the last with Panko breadcrumbs. This systematic approach will streamline the breading process, making it easier and more efficient.
Start by taking a piece of the stuffed chicken, dredging it in the seasoned flour. This initial coating helps the egg adhere better. Next, dip the floured chicken into the beaten eggs, ensuring it is completely coated. Finally, roll the chicken in the Panko breadcrumbs, pressing lightly to ensure an even coating. Repeat this process for all the assembled sliders, placing them on a plate or baking sheet as you go.
Having your dredging station set up not only saves time but also minimizes the mess in your kitchen, allowing you to focus on creating delicious sliders that will have everyone raving about your culinary skills.
By following these initial steps, you’re well on your way to crafting mouthwatering Mini Chicken Cordon Bleu Sliders that will delight your guests and elevate your next gathering. Stay tuned for the next part of this article, where we’ll delve into the frying process, assembly, and serving suggestions to make your sliders the star of the show.
Tips on Managing the Dredging Bowls for Best Results
Efficient management of the dredging bowls is crucial for ensuring that your chicken is perfectly coated. Set yourself up for success by organizing your workstation:
1. Three-Bowl System: Use three separate bowls arranged in a line. In the first bowl, place all-purpose flour seasoned with salt and pepper. The second bowl should contain beaten eggs, and the third bowl should hold the breadcrumb mixture, which can include panko for extra crunch.
2. Use One Hand for Wet and One for Dry: To keep your hands clean and avoid clumping, use one hand for the dry ingredients (flour and breadcrumbs) and the other for wet (egg). This technique minimizes mess and ensures an even coating.
3. Batch Processing: Work with a small batch of chicken pieces at a time. This prevents overcrowding in the bowls and ensures each piece gets adequate coverage without the coating getting soggy.
Coating the Chicken
Techniques for Achieving an Even and Thorough Coating
Coating your chicken properly is key to achieving the signature crunch of a chicken cordon bleu slider. Begin by taking your chicken breast pieces and patting them dry with paper towels. This helps the coating adhere better.
1. Flouring First: Dredge each piece of chicken in the seasoned flour, ensuring it’s fully coated. Shake off any excess flour before moving to the next bowl.
2. Egg Wash: Dip the floured chicken into the beaten eggs, allowing any extra egg to drip off. This wet layer is essential for the breadcrumbs to stick effectively.
3. Breadcrumb Coating: Finally, press the chicken into the breadcrumb mixture firmly to ensure a thick and even coating. Make sure to cover all sides and ends of the chicken for the best results.
Common Pitfalls to Avoid During This Step
– Skipping the Flour: Neglecting the flour can result in the breadcrumbs not adhering properly, leading to a soggy texture.
– Overcrowding the Breading Stations: If you try to coat too many pieces at once, you risk uneven coverage. Stick to a manageable amount.
– Not Pressing the Breadcrumbs: Ensure you press the breadcrumbs onto the chicken. A light touch won’t yield that satisfying crunch.
Frying the Sliders
Optimal Frying Conditions
Frying is where the magic happens, transforming your coated chicken into crispy sliders.
1. Oil Temperature: Use a deep skillet or frying pan and heat oil to about 350°F (175°C). This temperature is ideal for frying without absorbing too much oil. A thermometer is handy here.
2. Frying Time: Cook the chicken for about 4-5 minutes on each side. Avoid moving the chicken around too much during frying; let it form a crust before flipping.
3. Batch Cooking: Fry in small batches to maintain the oil temperature. Overcrowding the pan can lower the oil temperature, resulting in greasy chicken.
Visual Indicators of Doneness
To ensure your sliders are perfectly cooked:
– Golden Brown Color: The chicken should be a rich, golden-brown color.
– Internal Temperature: Use a meat thermometer to check that the internal temperature reaches 165°F (74°C). This ensures that the chicken is safe to eat and juicy.
Assembling the Sliders
Creative Suggestions for Layering the Sliders
Once your chicken is fried to perfection, it’s time to assemble your sliders. Start with a slider bun, which can be soft brioche or whole wheat, depending on your preference.
1. Layering Order: Begin with a slice of cheese (Swiss or Gruyère works beautifully), followed by your crispy chicken. Add a slice of ham for that classic cordon bleu flavor. Top with another slice of cheese before placing the top bun.
2. Extra Flavor: Consider adding fresh spinach or arugula for a peppery bite, or a slice of tomato for freshness.
Discussion on Condiment Options
Condiments enhance flavors and add an extra layer of taste to your sliders.
– Dijon Mustard: This classic pairing adds a nice tang and complements the richness of the chicken and cheese.
– Mayonnaise: A creamy spread can balance the crunchiness of the slider. Consider a flavored mayo, like garlic or herb mayo, for extra zest.
Serving Suggestions
Presentation Ideas
A well-presented dish can elevate your sliders from ordinary to extraordinary.
1. Platter Arrangement: Arrange the sliders on a large platter, alternating directions for a visually appealing display. Use toothpicks to hold the sliders together and make them easy to grab.
2. Garnishing: Fresh parsley or microgreens can add a pop of color. Scatter them around the sliders for an elegant touch.
Pairing Options
Pairing your sliders with the right sides and beverages enhances the entire meal experience.
– Recommended Sides: Consider serving with sweet potato fries, coleslaw, or a light salad. These sides complement the richness of the sliders without overwhelming the palate.
– Dipping Sauces: Alongside your sliders, include dipping sauces like honey mustard or ranch for an interactive dining experience.
– Beverages: Light beers, sparkling water, or a crisp white wine work well with the savory flavors of the sliders.
Nutritional Information
Overview of Nutritional Benefits
These Mini Chicken Cordon Bleu Sliders offer a delightful balance of protein and flavor.
– Chicken: A great source of lean protein, essential for muscle growth and repair.
– Cheese: Provides calcium and vitamin D, which are important for bone health.
– Whole Wheat Buns: Opting for whole wheat buns can increase fiber intake, supporting digestive health.
Discussion on Portion Sizes and Healthy Eating Considerations
When serving sliders, consider portion sizes. Each slider is a perfect bite-sized treat, but it’s easy to overindulge. Aim for 2-3 sliders per person as a main course, supplemented with a side dish.
While these sliders can be a part of a balanced diet, moderation is key. Enjoy them occasionally, perhaps during a gathering or special occasion.
Conclusion
Mini Chicken Cordon Bleu Sliders are not just a meal; they are an experience that brings joy to any occasion. Their crunchy exterior, savory filling, and versatility make them an ideal party food. Whether it’s game day, a birthday celebration, or a family gathering, these sliders are sure to be a hit.
Encourage your guests to dive in and savor the delightful combination of flavors. With easy-to-follow steps and a bit of creativity in the kitchen, you can whip up these delicious sliders that will leave everyone asking for seconds.
Explore the versatility of sliders for various occasions. From casual get-togethers to more formal events, these Mini Chicken Cordon Bleu Sliders are bound to impress. Try this recipe today and enjoy the deliciousness that unfolds with every bite.
