Introduction to Crunchy Golden Chicken Tenders with Honey Mustard Magic
In the realm of comfort food, few dishes can match the sheer satisfaction that comes from crispy chicken tenders. These Crunchy Golden Chicken Tenders, paired with a delightful honey mustard dip, are not just a meal but an experience—perfect for family dinners, game day gatherings, or simply a cozy night in. The allure of chicken tenders lies in their versatility and ease of preparation, making them a favorite for cooks of all levels. This article aims to guide you step-by-step through the preparation of these flavorful tenders, ensuring a dish that is not only delicious but also fun to make. With the right combination of marination, precise breading techniques, and frying methods, you’ll achieve a perfectly crunchy exterior while keeping the chicken juicy and tender on the inside.
Understanding the Ingredients
Exploring the Chicken Ingredients
At the heart of any great chicken tender recipe lies the chicken itself. For this dish, boneless, skinless chicken breasts are the ideal choice. They are not only easy to handle but also provide a tender and juicy base for the tenders. The absence of bones and skin simplifies the preparation process, allowing you to focus on achieving that perfect crunch. Moreover, chicken breasts are known for their mild flavor, which readily absorbs the seasonings and marinades, making them a blank canvas for culinary creativity.
One of the essential components in our chicken tender recipe is buttermilk. This ingredient plays a pivotal role in marinating the chicken, tenderizing it, and adding a rich flavor profile. The acidity of buttermilk breaks down the proteins in the chicken, resulting in a more tender texture. Additionally, the creamy consistency of buttermilk helps the seasonings adhere better, ensuring that every bite is packed with flavor. If you don’t have buttermilk on hand, a simple substitute can be made by mixing milk with a splash of vinegar or lemon juice, allowing it to sit for a few minutes to curdle.
The Essential Seasonings
To elevate the taste of our chicken tenders, we must not overlook the importance of seasonings. Garlic powder, onion powder, and smoked paprika are the key players in enhancing the flavor profile of the chicken. Garlic powder adds a subtle warmth and depth, while onion powder contributes a hint of sweetness that balances the dish. Smoked paprika, on the other hand, infuses a delightful smoky flavor, transporting your taste buds to a backyard barbecue with every bite.
Of course, the basic staples of salt and pepper cannot be forgotten. These fundamental seasonings serve to highlight the other flavors in the dish. Salt enhances the natural taste of the chicken, while freshly cracked black pepper adds a touch of heat and complexity. Together, these seasonings create a harmonious blend that ensures your chicken tenders are anything but bland.
The Breading Process
The breading process is where the magic truly happens, transforming simple chicken pieces into crunchy, golden delights. In this recipe, we utilize all-purpose flour and Panko breadcrumbs for a superior texture. All-purpose flour acts as the first layer of the breading, forming a base that allows the egg wash to stick effectively. But it’s the Panko breadcrumbs that take the crunch factor to the next level. Unlike traditional breadcrumbs, Panko is coarser and lighter, creating a crispier coating once fried.
To further enhance the flavor of the breading, we’ll incorporate dried oregano and cayenne pepper. Dried oregano adds an aromatic herbaceous note, while cayenne pepper brings an optional level of heat, allowing you to customize the dish to your taste preferences. The combination of these ingredients not only adds depth to the flavor but also contributes to the overall crunch and visual appeal of the chicken tenders.
Creating the Honey Mustard Dip
No chicken tender dish is complete without a complementary dipping sauce, and our honey mustard dip is the perfect match. This simple yet flavorful concoction combines mayonnaise, honey, Dijon mustard, and a splash of apple cider vinegar. The mayonnaise serves as a creamy base, while honey provides natural sweetness that balances the tangy notes of Dijon mustard. The apple cider vinegar adds a touch of acidity, brightening the overall flavor and helping to cut through the richness of the fried chicken.
This honey mustard dip not only enhances the taste of the crunchy chicken tenders but also brings a delightful contrast in texture. Its creamy consistency pairs beautifully with the crispy coating, making each bite an explosion of flavor. Whether you’re serving this dish at a family gathering or enjoying a quiet evening at home, this dip elevates the meal to new heights.
Step-by-Step Preparation of Crunchy Chicken Tenders
Marinating the Chicken
The first crucial step in preparing your Crunchy Golden Chicken Tenders is the marination process. Begin by cutting your boneless, skinless chicken breasts into uniform strips, ensuring they cook evenly. Place the chicken strips in a bowl and cover them generously with buttermilk. For maximum flavor and tenderness, it’s best to let the chicken marinate for at least one hour, although marinating overnight in the refrigerator will yield even better results.
The science behind marinating chicken lies in the interaction between the meat and the marinade. As the chicken sits in the buttermilk, the acids begin to break down the proteins, resulting in a more tender texture. Furthermore, the buttermilk infuses the chicken with flavor, ensuring that each bite is deliciously seasoned. For those looking to add extra layers of flavor, consider incorporating some of the seasonings—like garlic powder and smoked paprika—directly into the buttermilk marinade.
Setting Up the Breading Station
Once the chicken has marinated to perfection, it’s time to set up your breading station. An efficient breading station is key to achieving that coveted crunchy coating. Start by preparing three shallow dishes: one for the seasoned flour mixture, one for the beaten eggs, and one for the Panko breadcrumb mixture.
In the first dish, combine all-purpose flour with garlic powder, onion powder, smoked paprika, salt, and pepper. This seasoned flour will serve as the foundation of your breading. In the second dish, beat a couple of eggs with a splash of water to create an egg wash that will help the breadcrumbs adhere to the chicken. Finally, in the third dish, combine Panko breadcrumbs, dried oregano, and cayenne pepper to create the crunchy coating.
Maintaining a clean and organized workspace is essential for optimal results. As you prepare the chicken tenders, make sure to keep one hand for the wet ingredients (chicken and egg wash) and the other for the dry ingredients (flour and breadcrumbs) to avoid any messy cross-contamination. This technique will not only streamline the process but also ensure a more pleasant cooking experience.
Coating the Chicken Tenders
Now that your chicken strips are marinated and your breading station is set up, it’s time to coat the chicken tenders. Start by taking a piece of marinated chicken and dredging it in the seasoned flour, ensuring it is fully coated. Shake off any excess flour before dipping the chicken into the egg wash. Allow any excess egg to drip off before moving the chicken to the Panko breadcrumb mixture. Press the breadcrumbs onto the chicken strip firmly, ensuring an even and thorough coating.
Repeat this process for all the chicken strips, placing the coated tenders on a baking sheet lined with parchment paper. At this point, you can let the coated chicken tenders rest for a few minutes, allowing the breading to set and adhere better during frying. This brief resting period is crucial for achieving that ultimate crunch when the tenders hit the hot oil.
With your coated chicken tenders ready, you’re well on your way to creating a meal that promises to be both enjoyable and satisfying. Stay tuned as we delve into the frying techniques and finalize this mouthwatering dish in the next part.
Detailed Instructions for Coating Chicken Strips
Coating your chicken tenders correctly is crucial to achieving that perfect crispiness and golden-brown finish. Start by preparing your chicken strips. Ensure they are cut uniformly, about 1-inch wide and 4-5 inches long, allowing for even cooking.
Step 1: Prepare Your Breading Station
Set up a breading station with three shallow dishes:
1. Flour Mixture: Combine 1 cup of all-purpose flour with salt, pepper, and your choice of spices (like paprika or garlic powder) in the first dish.
2. Egg Wash: In the second dish, whisk together two large eggs and a tablespoon of water until fully blended.
3. Breadcrumbs: Fill the third dish with 1 cup of breadcrumbs. For added crunch, consider using panko breadcrumbs.
Step 2: Coating the Chicken
1. Dredge in Flour: Begin with the flour mixture. Take a chicken strip and coat it lightly in the flour, shaking off any excess. This creates a dry surface for the egg to adhere to.
2. Dip in Egg Wash: Next, dip the floured chicken strip into the egg wash, ensuring it is fully submerged. The egg serves as a glue that holds the breadcrumbs in place.
3. Coat with Breadcrumbs: Finally, roll the chicken strip in the breadcrumb mixture, pressing gently to ensure an even coating. Place the coated strip on a wire rack or a parchment-lined baking sheet. Repeat this process until all chicken strips are coated.
Common Mistakes to Avoid
– Overcrowding the Pan: When frying, avoid placing too many chicken strips in the pan at once. Crowding can lead to uneven cooking and steaming rather than frying, resulting in soggy tenders. Fry in batches to maintain consistent temperature and crispiness.
– Inadequate Coating: Ensure each chicken strip is evenly coated at each step. An incomplete coating can lead to dryness or uneven texture. Take your time with the breading process for the best results.
Frying Techniques for Perfectly Crispy Chicken Tenders
Heating the Oil
The right oil temperature is essential for achieving crispy chicken tenders. You want your oil to be between 350°F and 375°F. To check if your oil is hot enough, drop a small piece of bread into the oil; it should bubble and brown within about 60 seconds.
Types of Oil
Use oils with high smoke points for frying, such as canola, peanut, or vegetable oil. These oils can withstand high temperatures without burning, resulting in crispy tenders.
Importance of Oil Depth
A minimum depth of 2 inches of oil is recommended for frying chicken tenders. This allows for even cooking and helps avoid the risk of the tenders becoming greasy or soggy.
Frying the Chicken Tenders
1. Fry in Batches: Carefully place several coated chicken tenders in the hot oil, ensuring they are not overcrowded. This will ensure a consistent frying temperature.
2. Monitor Cooking Time: Fry the chicken tenders for about 4-5 minutes per side or until they are golden brown and cooked through. Use a meat thermometer to check the internal temperature, which should reach 165°F.
3. Drain Excess Oil: Once cooked, use a slotted spoon to remove the chicken tenders from the oil and place them on a wire rack or paper towels to drain any excess oil. This step is crucial for maintaining crispiness.
Making the Honey Mustard Magic Dip
Combining the Ingredients
The honey mustard dip is simple yet bursting with flavor. Here’s how to make it:
1. Ingredients:
– ½ cup honey
– ¼ cup Dijon mustard
– ¼ cup mayonnaise (optional for creaminess)
– 1 tablespoon apple cider vinegar (for tang)
2. Mixing: In a small bowl, combine the honey, Dijon mustard, and mayonnaise. Whisk until smooth. If you prefer a tangy twist, add the apple cider vinegar and mix well.
Versatility of the Dip
This honey mustard dip is not just for chicken tenders; it can be used as a salad dressing, sandwich spread, or a dip for fresh vegetables. Its versatility makes it a fantastic addition to many dishes, enhancing flavors and providing a delightful contrast.
Serving Suggestions and Pairing Ideas
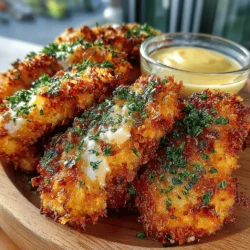
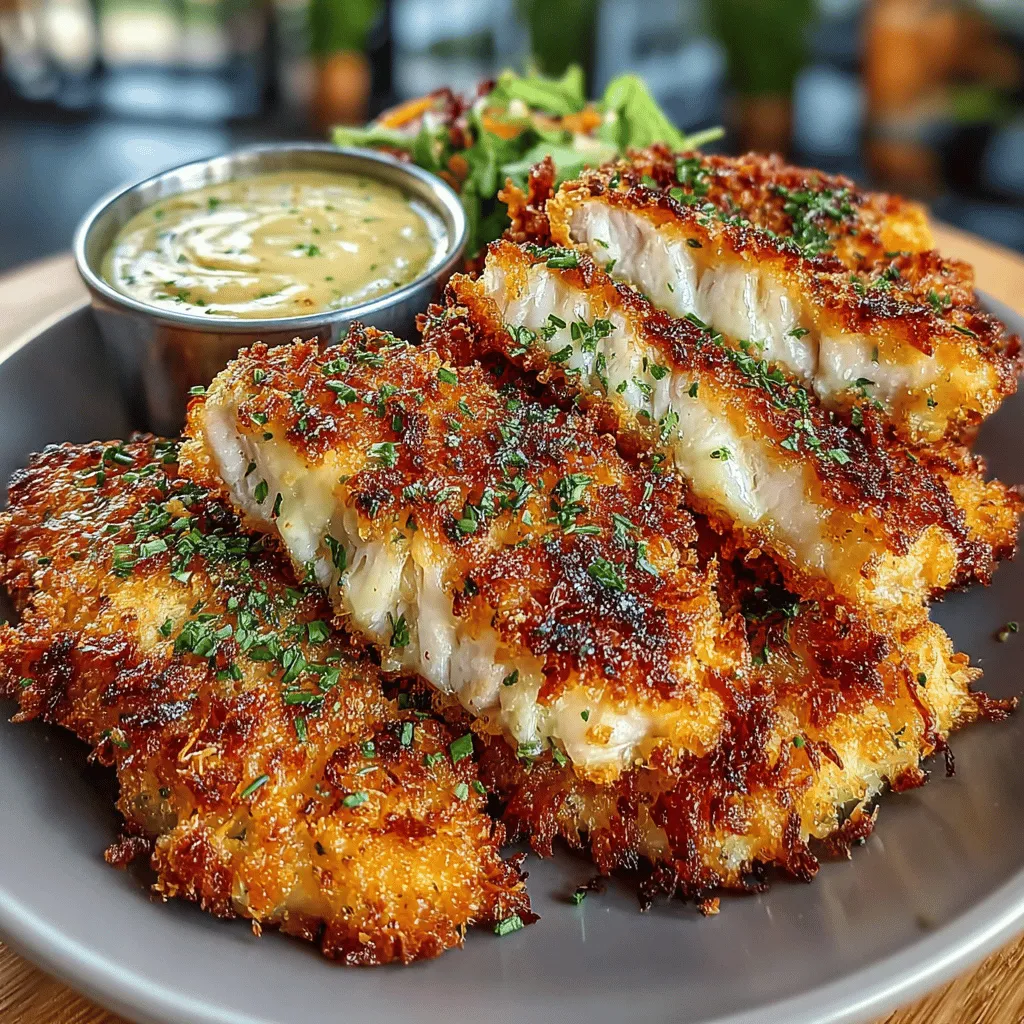
Presenting the Dish
When it comes to serving your chicken tenders, presentation matters! Arrange the crispy chicken tenders on a large platter, with a small bowl of honey mustard dip in the center. For a touch of elegance, consider garnishing with fresh parsley or dill sprigs.
Pairing Recommendations
To elevate your meal, consider these side dishes that complement your chicken tenders:
– Crispy Fries: A classic pairing that never disappoints. Opt for regular, sweet potato, or even zucchini fries for a healthier twist.
– Salad: A fresh green salad with a light vinaigrette balances the richness of the chicken tenders.
– Vegetable Sticks: Carrot, celery, and bell pepper sticks provide a crunchy contrast and a healthy option.
Beverage Pairings
Pair your meal with refreshing beverages such as:
– Soft Drinks: Classic cola or lemon-lime sodas are perfect for a casual meal.
– Iced Tea: A glass of sweetened or unsweetened iced tea adds a refreshing element.
– Light Beers: If you prefer alcoholic beverages, light beers or wheat beers complement the flavors beautifully.
Conclusion: Savoring Your Crunchy Golden Chicken Tenders
Creating homemade Crunchy Golden Chicken Tenders with Honey Mustard Magic is not only a rewarding culinary experience but also an opportunity to bring friends and family together. The joy of perfecting this classic dish lies in the crispy texture, the balance of flavors, and the satisfaction of enjoying a meal made from scratch.
As you embark on this delicious journey, feel free to experiment with the recipe, customizing the spices or the dip to suit your taste preferences. Cooking is fun, and it’s about exploration and creativity in the kitchen.
Remember, these chicken tenders aren’t just a meal; they’re an experience to be shared and cherished. Gather your loved ones around the table, savor the flavors, and create lasting memories. Enjoy your culinary creation, and don’t forget to share your results!