Delightful No-Bake S’mores Cups: A Sweet Escape to Nostalgic Flavors
S’mores are more than just a treat; they are an emblem of summer nights, campfires, and cherished memories spent with friends and family. The simple combination of toasted marshmallows, rich chocolate, and crunchy graham crackers evokes a sense of nostalgia that many of us hold dear. However, the traditional preparation method, involving open flames and outdoor settings, can be a bit impractical for everyday cravings or indoor gatherings. Enter the Delightful No-Bake S’mores Cups—a modern twist on the classic recipe that encapsulates the essence of s’mores without requiring a campfire.
These No-Bake S’mores Cups are an excellent choice for those seeking a quick and easy dessert that can effortlessly impress at parties, family gatherings, or even as a sweet indulgence during a cozy night in. With minimal preparation time and no need for baking, this dessert allows everyone to savor the flavors of s’mores in a fun and accessible format.
Understanding the Ingredients
To craft these delicious No-Bake S’mores Cups, it’s essential to understand the role of each ingredient, as they all contribute to the dessert’s delightful taste and texture.
– Graham Cracker Crumbs: This base ingredient provides a nostalgic flavor and texture that mirrors traditional s’mores. The slight sweetness and crunch of the graham cracker crumbs form the foundation of the cups.
– Granulated Sugar: A touch of sugar enhances the sweetness of the crust, balancing the flavors and ensuring that every bite is indulgently sweet.
– Unsalted Butter: This ingredient acts as a binder, holding the graham cracker crumbs and sugar together while adding a rich, buttery flavor that elevates the overall taste of the crust.
– Mini Marshmallows: These fluffy morsels are the stars of the show, delivering the iconic marshmallow flavor and chewy texture that is synonymous with s’mores.
– Semi-Sweet Chocolate Chips: The heart of the filling, these chocolate chips provide a rich, melty chocolate experience that complements the sweetness of the marshmallows and the crunch of the crust.
– Vanilla Extract: A splash of vanilla extract enhances the overall flavor profile, adding depth and a hint of warmth that ties the ingredients together.
– Toppings: While optional, toppings such as additional mini marshmallows, chocolate shavings, or drizzles of chocolate syrup can enhance both the presentation and the taste, making the dessert even more enticing.
Step-by-Step Guide to Making No-Bake S’mores Cups
Preparing the Crust
The first step in creating your Delightful No-Bake S’mores Cups is preparing the crust. In a mixing bowl, combine graham cracker crumbs and granulated sugar. The proportion of sugar can be adjusted to your taste; however, a classic balance typically calls for about 1/4 cup of sugar for every 1 1/2 cups of graham cracker crumbs. This mix will provide the perfect sweetness while maintaining the signature flavor of s’mores.
Next, melt the unsalted butter in a microwave-safe bowl or on the stovetop. Allow the butter to cool slightly before adding it to the graham cracker mixture. Stir until the crumbs are evenly coated and the mixture resembles wet sand. Achieving the right consistency is crucial; the mixture should hold together when pressed.
To ensure a compact and evenly distributed crust, use the back of a measuring cup or your hands to firmly press the crust mixture into the bottom of cupcake liners placed in a muffin tin. Press firmly, yet gently, to create a solid base that will hold the filling without crumbling. This step is vital, as a well-formed crust will support the layers above it and make the cups easier to serve.
Forming the Base
Once the crust is prepared and compacted into the muffin tin, it’s time to move on to the chocolate filling. Before that, ensure that your muffin tin is properly lined with cupcake liners; this will make for easy removal later. The liners not only help with serving but also add a nice touch to the presentation.
Creating the Chocolate Filling
To make the luscious chocolate filling, begin by measuring out the semi-sweet chocolate chips. Place them in a microwave-safe bowl, then microwave in intervals of 30 seconds, stirring in between, until the chocolate is completely melted and smooth. This method is crucial to prevent the chocolate from seizing up or burning, which can happen if melted too quickly.
Once melted, remove the bowl from the microwave and stir in a splash of vanilla extract, which will enhance the chocolate’s flavor. The warm melted chocolate can then be poured over the prepared crust in each muffin cup. Ensure that the chocolate is evenly distributed to create a delightful layer that pairs perfectly with the crust.
After filling each cup with chocolate, it’s time to layer in the mini marshmallows. You can sprinkle a generous handful atop the melted chocolate, ensuring each cup is filled with this iconic s’mores ingredient.
At this point, the cups can be chilled in the refrigerator for at least 30 minutes to allow the chocolate to set and the marshmallows to soften slightly, creating that quintessential gooey texture synonymous with s’mores.
With these initial steps completed, you’re well on your way to creating a delightful dessert that will bring back the joy of campfire s’mores with every delicious bite. Stay tuned for the next part of the guide, where we will explore the finishing touches to make your No-Bake S’mores Cups truly irresistible.
Tips on Achieving the Perfect Chocolate Texture
To ensure your chocolate filling achieves that velvety, smooth texture that perfectly complements the crunchy graham cracker crust, it’s crucial to use high-quality chocolate. Opt for semi-sweet or bittersweet chocolate chips, as they melt beautifully and provide a rich flavor. When melting the chocolate, do so gently to avoid burning it; using a microwave in 30-second intervals or a double boiler is recommended. Once melted, mixing in the cream will help achieve that glossy finish.
Another tip for a perfect texture is to allow the melted chocolate to cool slightly before adding it to the other ingredients. This step ensures that the chocolate does not seize up when combined with the cream or other components.
Layering the Filling
Spoon Over the Crust for Balanced Flavor
When it comes to layering the chocolate filling, moderation is key. A good rule of thumb is to spoon about 2-3 tablespoons of the chocolate mixture over each graham cracker crust layer. This amount allows for a generous yet balanced chocolate flavor without overwhelming the other components.
Customizing Chocolate Layer Thickness
If you prefer a richer chocolate experience, feel free to increase the amount of chocolate filling slightly. Just remember that this will also increase the overall sweetness, so adjust accordingly based on your taste preferences. If you lean towards a lighter filling, reduce the amount of chocolate, ensuring that each cup maintains a harmonious balance of flavors.
Adding Marshmallows
Distributing Mini Marshmallows Evenly
Mini marshmallows are a quintessential element of s’mores, providing that sweet, chewy texture. To evenly distribute them, sprinkle a handful of mini marshmallows over the chocolate layer before it sets. This will allow them to sink slightly into the warm chocolate, ensuring they are enveloped in the rich flavor.
Adjusting to Personal Taste Preferences
The amount of marshmallows can be tailored to your liking. If you enjoy a stronger marshmallow presence, you can add a thicker layer on top of the chocolate. Alternatively, if you prefer a more subtle flavor, use fewer marshmallows. The contrast between the creamy chocolate filling and the fluffy marshmallows is what makes these s’mores cups so special, so feel free to experiment until you find your ideal combination.
Chilling to Set
Importance of Chilling Time
Chilling your No-Bake S’mores Cups is crucial for setting the layers and achieving the desired consistency. After adding the marshmallows, cover the cups with plastic wrap and place them in the refrigerator for at least 2 hours. This time allows the chocolate to firm up and the marshmallows to meld into the layers, creating a cohesive dessert that holds its shape.
Ensuring Proper Setting
To ensure a perfect set, check the cups after the minimum chilling time. If the chocolate feels firm to the touch and the marshmallows have a slight give, they are ready to serve. If not, allow them to chill for an additional 30 minutes. Avoid the temptation to shorten the chilling time, as rushing this process can lead to a messy presentation when serving.
Finishing Touches
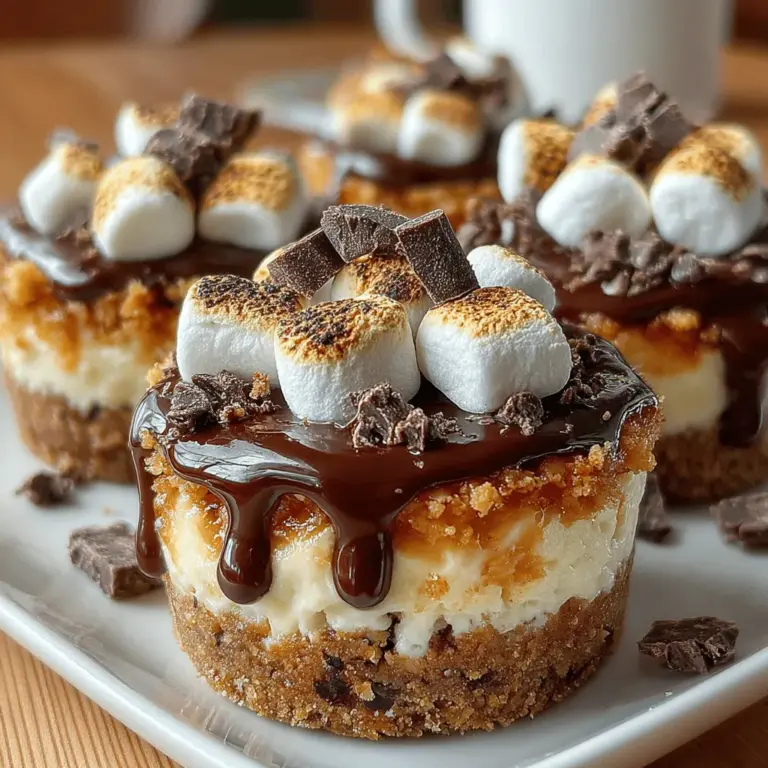
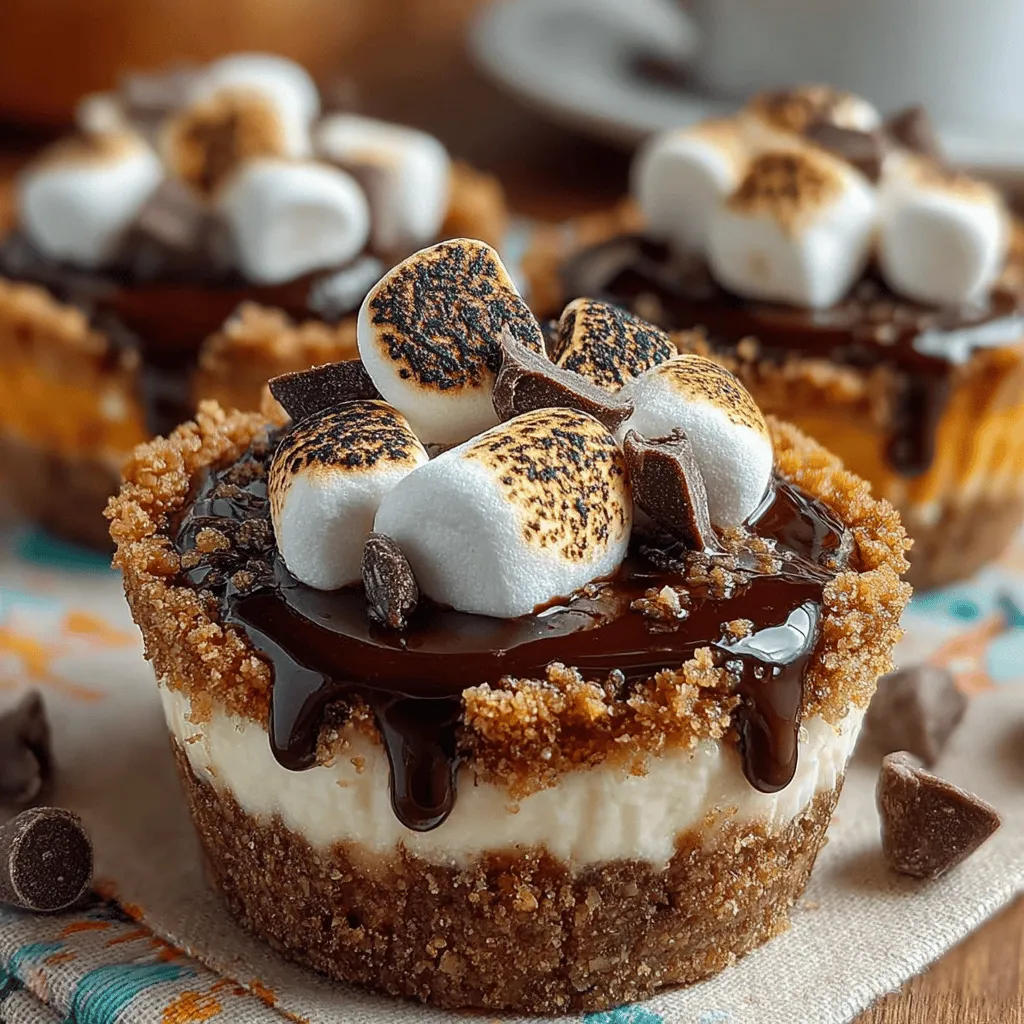
Options for Torched Marshmallows
For a gourmet touch that elevates your No-Bake S’mores Cups, consider using a kitchen torch to lightly toast the marshmallows on top. This adds a delightful caramelized flavor and an appealing texture contrast. When using a torch, hold it a few inches above the marshmallows and move it in a circular motion to avoid burning them. Be sure to exercise caution and keep the torch away from any flammable materials.
Decorating with Extra Chocolate and Marshmallows
To enhance the visual appeal of your cups, drizzle melted chocolate over the top or sprinkle some additional mini marshmallows. You can even add crushed graham crackers for a decorative touch that emphasizes the classic s’mores theme. This not only makes the dessert look more enticing but also adds texture and flavor to each bite.
Serving Suggestions
Presenting at Gatherings
No-Bake S’mores Cups are perfect for any gathering, whether it’s a summer barbecue, a picnic, or a cozy movie night. Serve them in clear cups to showcase the beautiful layers, and consider garnishing with a sprig of mint for an added touch of freshness.
Pairing with Beverages and Other Desserts
To create a delightful dessert table, pair these cups with beverages such as iced coffee, milkshakes, or even hot chocolate for a comforting experience. Additionally, they complement other desserts like fruit tarts or brownies, allowing guests to enjoy a variety of flavors and textures.
Nutritional Information
Overview of Nutritional Benefits
While No-Bake S’mores Cups may be considered a treat, they can still offer some nutritional benefits when made with quality ingredients. Dark chocolate, for example, contains antioxidants, while marshmallows contribute a bit of energy through sugars. The graham crackers provide carbohydrates, which give you a quick energy boost.
Portion Sizes and Balanced Diet Considerations
Since these cups are rich and satisfying, serving them in smaller portions allows everyone to enjoy a taste without overindulging. Pairing them with fresh fruit or a light yogurt can provide balance and add a nutritional element to your dessert experience. Remember, moderation is key, and enjoying these as an occasional treat can fit into a balanced diet.
Conclusion
In summary, making Delightful No-Bake S’mores Cups is a simple and enjoyable process that encapsulates the nostalgic flavors of summer s’mores. Their versatility makes them suitable for various occasions, while the combination of creamy chocolate, fluffy marshmallows, and crunchy graham crackers creates a delightful dessert experience.
We encourage you to try this recipe and savor the joy of preparing a treat that captures the essence of warm summer evenings, all from the comfort of your home. Whether you’re hosting friends or indulging in a sweet moment alone, these No-Bake S’mores Cups are sure to delight your taste buds and bring a smile to your face. Enjoy every delicious bite!
