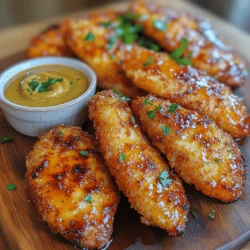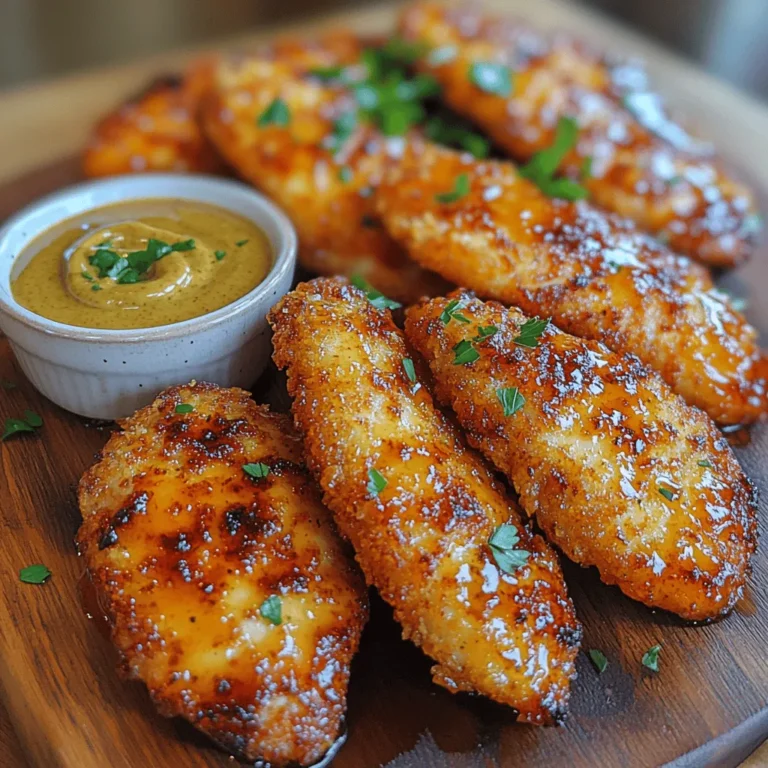
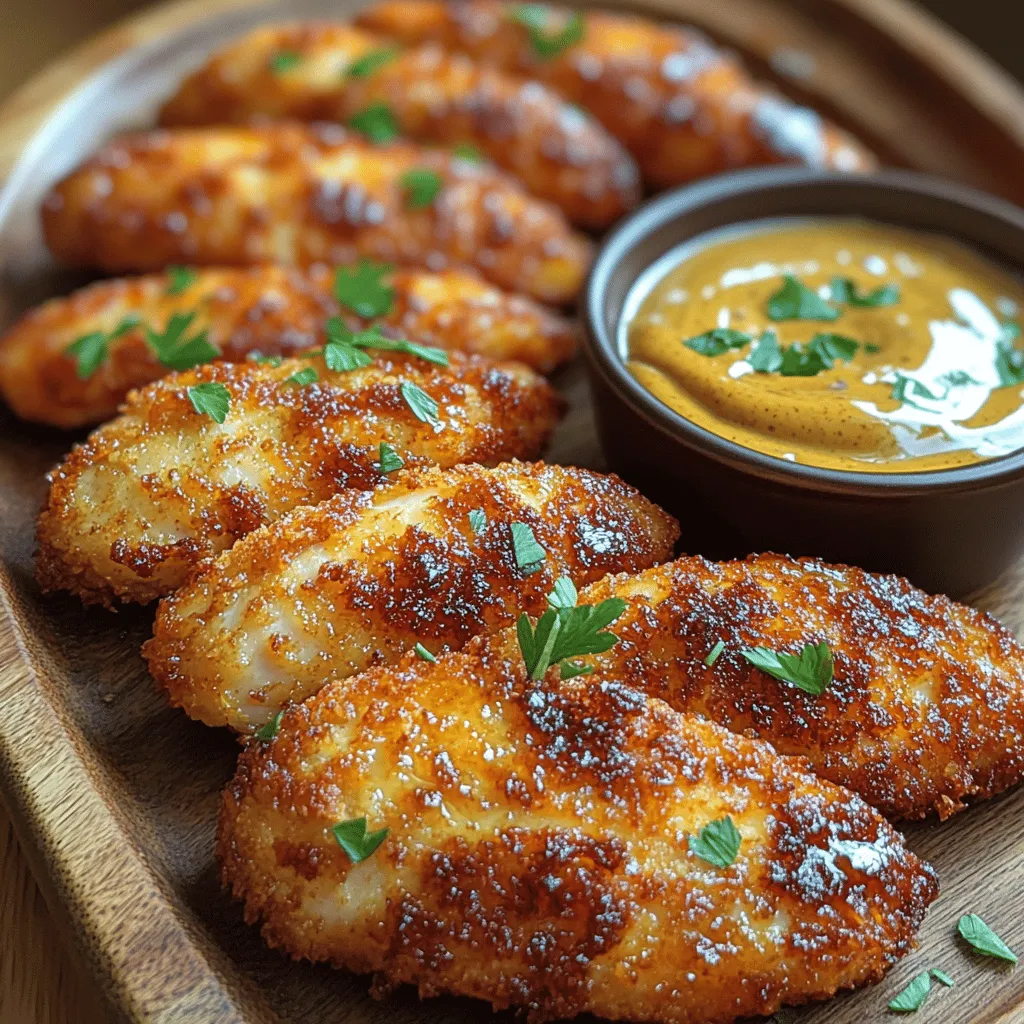
Crunchy Chicken Tenders with Sweet & Tangy Honey Mustard Dip
Introduction
Chicken tenders have long been a beloved comfort food, cherished for their satisfying crunch and tender, juicy meat. Whether served as a quick weeknight dinner, a party appetizer, or a delightful snack, these golden-brown strips of chicken are universally adored by both children and adults. The beauty of chicken tenders lies not just in their flavor but also in their versatility; they can be paired with a variety of sauces and sides, making them a staple in many households.
While store-bought chicken tenders may offer convenience, nothing compares to the taste and texture of homemade versions. By preparing chicken tenders from scratch, you have complete control over the quality of the ingredients, the level of seasoning, and the overall cooking process. This homemade approach not only elevates the dish but also allows you to customize flavors to suit your palate.
In this recipe, we’ll explore how to make crunchy chicken tenders paired with a delightful sweet and tangy honey mustard dip. The tenders boast a crispy exterior achieved through a special coating technique, while the dip balances sweetness with a hint of tanginess, creating a perfect accompaniment for these golden strips. This dish is sure to impress your family and friends, making it a must-try for any chicken lover.
Understanding the Ingredients
To create the perfect crunchy chicken tenders, it’s essential to select high-quality ingredients that contribute to both flavor and texture. Here’s a closer look at the main components of this recipe:
– Chicken Breast: The star of the dish, chicken breast is favored for its lean meat and ability to absorb flavors. Slicing the chicken into uniform strips ensures even cooking and consistent tenderness.
– Buttermilk: One of the key ingredients in this recipe is buttermilk, which plays a crucial role in marinating the chicken. The acidity in buttermilk helps to tenderize the meat, resulting in juicy, flavorful tenders. Additionally, the creamy texture of buttermilk allows the seasonings to cling to the chicken, enhancing the overall flavor.
– Breadcrumbs: For the ultimate crunch, we recommend using panko breadcrumbs. Unlike traditional breadcrumbs, panko is coarser and lighter, which yields a superior crispy texture when fried or baked. This choice is essential for achieving that satisfying crunch that everyone loves.
– Honey Mustard Dip: The dipping sauce is where the magic truly happens. A combination of honey and mustard creates a harmonious balance of sweet and tangy flavors. The sweetness from the honey complements the sharpness of the mustard, while a touch of mayonnaise adds creaminess to the mix. This dip not only enhances the chicken tenders but can also be used with a variety of other dishes, making it a versatile addition to your condiment repertoire.
The Marination Process
Marinating the chicken in buttermilk is a fundamental step that elevates the flavor and texture of the tenders. Here’s how to effectively marinate your chicken:
1. Prepare the Marinade: In a large bowl, combine buttermilk with your choice of seasonings. Common additions include salt, pepper, garlic powder, and paprika, which infuse the chicken with flavor.
2. Add the Chicken: Place the chicken strips into the bowl, ensuring that each piece is fully submerged in the buttermilk mixture. It’s important to use a container that allows for ample liquid coverage for even marination.
3. Marination Duration: For optimal results, marinate the chicken for at least 30 minutes. However, if time permits, extending the marination period to 2 hours or even overnight in the refrigerator will yield even more tender and flavorful chicken. The longer the chicken sits in the marinade, the more pronounced the flavors will be.
4. Flavor Distribution: To ensure an even distribution of flavor, consider flipping the chicken strips halfway through the marination process. This simple step can make a significant difference, especially if you’re working with larger or thicker pieces of chicken.
By following these steps, you’ll prepare chicken that is not only tender but also packed with flavor, setting the stage for the crunchy coating that follows.
Preparing the Coating
Once the chicken is perfectly marinated, it’s time to prepare the coating that will give the tenders their signature crunch. Here’s a step-by-step breakdown of how to achieve this:
1. Set Up a Dredging Station: Prepare three shallow dishes for the dredging process. In the first dish, place flour mixed with a pinch of salt and pepper. In the second dish, beat a couple of eggs to create an egg wash. In the third dish, combine panko breadcrumbs with any additional seasonings you desire, such as Italian herbs or Parmesan cheese for added flavor.
2. Dredging the Chicken: Start by removing a piece of marinated chicken from the buttermilk, allowing any excess to drip off. First, coat the chicken in the flour mixture, shaking off any excess. This initial layer helps the egg wash adhere better to the chicken.
3. Egg Wash: Next, dip the floured chicken into the egg wash, ensuring that it is fully coated. The egg acts as a binder, helping the breadcrumbs stick to the chicken.
4. Coating with Panko: Finally, transfer the chicken to the dish with panko breadcrumbs. Press the breadcrumbs onto the chicken firmly to ensure they adhere well. This step is crucial; a good pressing will create a thicker, crunchier coating when cooked.
5. Repeat: Continue this process with the remaining chicken strips, laying them out on a parchment-lined baking sheet or plate. This will make it easier to transfer them to the frying pan or oven later.
By following these steps, you’ll create a deliciously crunchy coating that ensures every bite of chicken tender is packed with flavor and texture.
Crafting the Honey Mustard Dip
While the chicken tends to take center stage, the honey mustard dip is what truly rounds out the meal. Here’s how to craft this tangy and sweet dip that will have everyone coming back for more:
1. Combine Ingredients: In a small mixing bowl, combine equal parts honey and mustard. Depending on your preference, you can adjust the ratio to make the dip sweeter or tangier. A classic ratio to start with is 1/4 cup of honey to 1/4 cup of Dijon mustard.
2. Add Creaminess: To elevate the dip, incorporate a couple of tablespoons of mayonnaise or Greek yogurt. This addition not only adds creaminess but also balances the flavors, making the dip more cohesive and enjoyable.
3. Mix Well: Whisk the ingredients together until they are fully combined and smooth. Taste the dip and adjust the seasoning if needed; a pinch of salt or a dash of vinegar can enhance the overall flavor.
4. Chill: For the best flavor, let the dip chill in the refrigerator for at least 15 minutes before serving. This allows the flavors to meld together, creating a richer taste that complements the chicken tenders beautifully.
With this honey mustard dip, you’ll have a perfect balance of sweetness and tanginess that pairs wonderfully with the crunchy chicken tenders, making your meal a memorable one.
In the following sections, we will delve into the cooking process and tips to achieve perfectly crispy chicken tenders as well as suggestions for serving and side dishes. Stay tuned for the complete culinary adventure!
Ingredients for the Dip
To create the perfect sweet and tangy honey mustard dip that complements your crunchy chicken tenders, you will need the following ingredients:
– Honey: This is the star ingredient that provides natural sweetness and balances the tanginess of mustard. Choose a high-quality, pure honey for the best flavor.
– Dijon Mustard: Known for its sharp and tangy flavor, Dijon mustard adds depth to the dip. It is smoother than yellow mustard and offers a nuanced taste that pairs well with the sweetness of honey.
– Mayonnaise: Adding mayonnaise creates a creamy texture, helping to cut through the sharpness of the mustard. This ingredient also adds richness to the dip.
– Apple Cider Vinegar: This ingredient introduces a layer of acidity that enhances the overall flavor profile, making the dip more refreshing and vibrant.
– Garlic Powder: A dash of garlic powder provides an aromatic element that elevates the dip’s flavor, giving it a subtle kick without overpowering the other ingredients.
– Salt and Black Pepper: These basic seasonings round out the flavor, ensuring balance. Adjust according to your taste preferences.
Adjusting the Dip for Personal Preferences
If you wish to tweak the dip to suit your taste, consider the following adjustments:
– Sweetness: To increase sweetness, simply add more honey. Conversely, to reduce sweetness, add more mustard or a splash of vinegar.
– Tanginess: For a tangier flavor, increase the amount of Dijon mustard or incorporate a bit of lemon juice. This can brighten the dip and make it more robust.
– Creaminess: If you prefer a thicker dip, reduce the amount of mayonnaise or add more mustard and honey. For a lighter version, use Greek yogurt instead of mayonnaise for a tangy twist.
Presentation Ideas for Serving the Dip
When it comes to serving your honey mustard dip alongside the crunchy chicken tenders, presentation can elevate the dining experience:
– Dipping Bowls: Use small, colorful bowls for the dip to create a vibrant contrast with the chicken tenders. Consider using individual bowls for each guest for a personal touch.
– Garnishes: Scatter fresh herbs like parsley or a sprinkle of paprika on top of the dip for added color and flavor. A few slices of lemon or lime on the side can also enhance visual appeal and add freshness.
– Platter Arrangement: Serve the chicken tenders on a large platter, placing the bowls of dip at strategic points for easy access. Arrange the tenders in a fan shape or stack them to create height.
Cooking the Chicken Tenders
Now that you have your dip ready, it’s time to focus on the chicken tenders. Follow these detailed steps to achieve that golden-brown perfection everyone craves.
Frying Techniques
1. Prepare the Breading Station: Set up three shallow bowls—one with flour seasoned with salt and pepper, the second with beaten eggs, and the third with breadcrumbs mixed with your choice of seasonings (like paprika or Italian seasoning).
2. Coat the Chicken: Dip each chicken tender in flour first, shaking off excess. Next, dip it in the egg, ensuring it’s well-coated. Finally, roll it in the breadcrumb mixture until fully covered.
3. Frying: In a heavy-bottomed skillet or deep fryer, heat oil to 350°F (175°C). This temperature is crucial for achieving crispy chicken tenders. Use a thermometer to check the oil temperature accurately.
Testing Oil Temperature
To test if your oil is ready for frying, drop a small piece of bread into the oil. If it sizzles and browns in about 60 seconds, the oil is hot enough. If it browns too quickly, the oil is too hot, and you should reduce the heat.
Safety Tips for Frying
– Avoid Overcrowding: Fry chicken tenders in small batches. Overcrowding the pan lowers the oil temperature, leading to soggy tenders. Frying in batches ensures that each piece gets the necessary space to cook evenly.
– Use a Slotted Spoon: When removing the chicken tenders from the oil, use a slotted spoon to allow excess oil to drain off before placing them on a paper towel-lined plate.
Draining and Serving
Once your chicken tenders are golden brown and crispy, it’s essential to drain them properly to keep them from becoming greasy.
Best Practices for Draining Excess Oil
1. Paper Towels: After frying, place the chicken tenders on a plate lined with paper towels. This absorbs excess oil and keeps the tenders crispy.
2. Cooling Rack: For optimal draining, consider using a wire cooling rack placed over a baking sheet. This allows air to circulate around the tenders, keeping them crispy on all sides.
Creative Serving Suggestions
Enhance your meal with these creative serving ideas:
– Side Dishes: Pair your chicken tenders with classic sides like coleslaw, crispy fries, or a fresh garden salad. For a healthier option, roasted vegetables or sweet potato wedges work beautifully.
– Garnishes: Fresh herbs, such as cilantro or chives, can be sprinkled on top of the chicken tenders for a pop of color and flavor. Slices of cucumber or cherry tomatoes on the side can add freshness.
Presentation Ideas
To elevate your dining experience:
– Themed Platters: Create a theme by serving the chicken tenders on a rustic wooden board or a colorful ceramic platter. You can even arrange the tenders in a circle, with the honey mustard dip in the center.
– Dipping Setup: Position the dipping bowls next to the chicken tenders, possibly with a small sign indicating the dip’s flavor. This not only informs your guests but also adds a professional touch.
Nutritional Insights
Homemade chicken tenders are a healthier alternative to store-bought frozen options. Here’s why:
– Control Over Ingredients: When you make chicken tenders at home, you control the quality of the ingredients, ensuring no preservatives or artificial additives are included.
– Caloric Breakdown: On average, each serving of homemade chicken tenders (about 3-4 pieces) contains approximately 300-400 calories, depending on the frying method and portion size. Compare this to frozen alternatives, which can contain added sodium and unhealthy fats.
Tips for Making the Dish Healthier
– Baking Instead of Frying: For a lighter version, consider baking the chicken tenders instead of frying. Coat the tenders with a little oil and bake them in a preheated oven at 400°F (200°C) for about 20-25 minutes, flipping halfway through.
– Gluten-Free Options: Substitute traditional breadcrumbs with gluten-free alternatives, such as crushed cornflakes or almond flour, to cater to dietary restrictions.
Conclusion
Making homemade crunchy chicken tenders with a sweet and tangy honey mustard dip is not only easy but also incredibly satisfying. The joy of sharing this dish with family and friends creates lasting memories around the dinner table. Whether served at a casual gathering or a special occasion, these tenders are sure to impress.
Don’t hesitate to experiment with variations of this recipe to suit your personal tastes. Consider adding spices to the breading, trying different dipping sauces, or even using different proteins like turkey or pork. The possibilities are endless, and the result is always delicious. So gather your ingredients, roll up your sleeves, and enjoy the delightful experience of creating this crunchy, flavorful dish.