Introduction
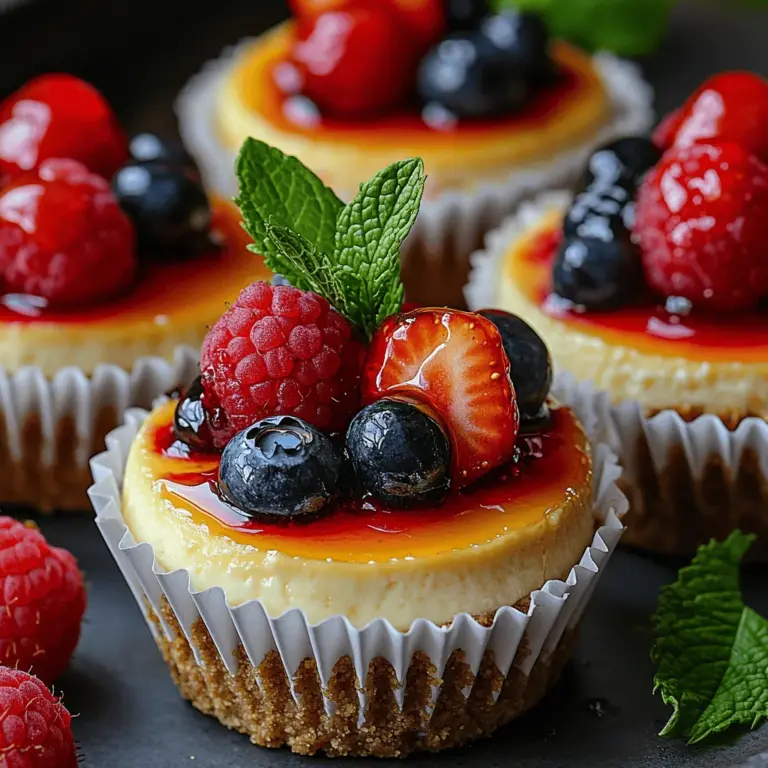
Mini cheesecakes are a versatile and delightful dessert that has captured the hearts of many dessert lovers. With their creamy texture and buttery crust, these bite-sized treats are not only delicious but also visually appealing. Cheesecakes have a long history, dating back to ancient Greece, where they were first served to athletes at the first Olympic Games. Over the centuries, this beloved dessert has evolved into various forms, but the classic cheesecake remains a favorite. In this recipe, we’ll explore how to create mini cheesecakes with a twist, incorporating fresh berries and a hint of lemon for a zesty flavor that will elevate your dessert game.
These mini cheesecakes are perfect for any occasion, whether you’re hosting a birthday party, celebrating a holiday, or simply treating yourself after a long week. Their individual portions make them easy to serve and enjoy, and the addition of fresh berries adds a burst of color and flavor that will impress your guests. Plus, they are easy to make, and you can prepare them ahead of time, making them an ideal choice for busy bakers.
Understanding the Components of Mini Cheesecakes
To create the perfect mini cheesecake, it’s essential to understand the key components that contribute to its delightful texture and flavor. Each ingredient plays a crucial role in ensuring that the final product is creamy, rich, and satisfying. Let’s take a closer look at the essential ingredients and their roles in creating these delectable mini cheesecakes.
The Crust: A Solid Foundation
The crust is the base of any cheesecake and serves as a solid foundation for the creamy filling. It adds texture and flavor, complementing the smoothness of the cheesecake. For our mini cheesecakes, we will use a classic graham cracker crust, which is both easy to make and delicious.
– Graham Cracker Crumbs: The classic choice for a cheesecake crust, graham cracker crumbs provide a sweet and slightly nutty flavor that pairs perfectly with the cheesecake filling. They create a crunchy texture that contrasts beautifully with the creamy filling.
– Sugar: To enhance the sweetness of the crust, granulated sugar is added. This ingredient balances the flavors and ensures that the crust is not too bland.
– Unsalted Butter: Providing richness and helping to bind the crust together, melted unsalted butter is a crucial ingredient. It adds a luxurious mouthfeel and ensures that the crust holds its shape when baked.
The Cheesecake Filling: Creamy and Decadent
The filling is the star of the show when it comes to cheesecake, and achieving the perfect creamy texture is essential. The following ingredients contribute to a smooth and flavorful filling that will leave you craving more.
– Cream Cheese: As the primary ingredient, cream cheese is responsible for the rich and creamy texture of the cheesecake. It should be at room temperature to ensure it blends smoothly with the other ingredients.
– Sugar: Granulated sugar is used to balance the richness of the cream cheese. The right amount of sugar enhances the overall flavor profile without overpowering the delicate taste of the cheesecake.
– Vanilla Extract: A splash of vanilla extract adds depth of flavor to the filling. It complements the sweetness of the sugar and the tanginess of the cream cheese, creating a harmonious blend of flavors.
– Eggs: Essential for structure and creaminess, eggs help the cheesecake set properly during baking. They contribute to the smooth texture and richness of the filling.
– Sour Cream: This ingredient contributes to the tangy flavor profile of the cheesecake, adding a layer of complexity to the taste. Sour cream also enhances the creaminess, making the filling even more decadent.
– Lemon Juice: For an optional zesty twist, fresh lemon juice brightens the taste of the cheesecake. The acidity of the lemon cuts through the richness and adds a refreshing element that complements the sweetness of the other ingredients.
Preparing the Mini Cheesecakes: Step-by-Step Instructions
Now that we have a solid understanding of the ingredients and their roles, let’s dive into the preparation of our mini cheesecakes. Follow these detailed step-by-step instructions to ensure perfection in every aspect of the recipe.
Preparing the Crust
1. Preheat the Oven: Start by preheating your oven to 325°F (163°C). Preheating ensures that the crust bakes evenly and achieves the right texture.
2. Prepare the Muffin Tin: Line a standard muffin tin with paper liners or grease it well with cooking spray. Using liners not only makes it easier to remove the cheesecakes later but also adds an appealing presentation to your mini treats.
3. Mix the Crust Ingredients: In a medium-sized mixing bowl, combine 1 1/2 cups of graham cracker crumbs, 1/4 cup of granulated sugar, and 1/2 cup of melted unsalted butter. Use a fork or a spatula to mix until the crumbs are evenly coated with the butter, and the mixture resembles wet sand.
4. Press the Crust Mixture into the Muffin Cups: Using a tablespoon or your fingers, press the crust mixture firmly into the bottom of each muffin cup. Ensure that the crust is evenly distributed and compacted to create a solid base for the cheesecake filling. This step is crucial for preventing the crust from crumbling when you remove the cheesecakes later.
5. Bake the Crust: Place the muffin tin in the preheated oven and bake for approximately 5-7 minutes, or until the crust is lightly golden and set. Keep a close eye on the crust to prevent over-baking, as it can become too hard.
After baking, remove the muffin tin from the oven and let it cool slightly while you prepare the cheesecake filling. This will allow the crust to firm up further and provide the perfect base for the creamy filling.
In the next section, we will delve into the preparation of the cheesecake filling, ensuring that you have all the necessary elements to create a truly delightful dessert that is sure to impress your family and friends. With the crust ready, we can now shift our focus to crafting the rich and creamy filling that will make these mini cheesecakes unforgettable.
Timing and Tips for Achieving the Perfect Golden Crust
Creating the perfect crust for your mini cheesecakes is essential for both flavor and texture. Timing is crucial, as an underbaked crust can become soggy, while an overbaked one may become too hard. For a golden crust, preheat your oven to 350°F (175°C) and bake the crusts for about 8-10 minutes. You’ll know they’re ready when they are fragrant and have turned a light golden brown.
To ensure an even bake, consider rotating the pan halfway through the baking time. This will help achieve that desirable consistency across all crusts. Once baked, allow the crusts to cool slightly before adding the cheesecake filling. This will help maintain their structure and prevent the filling from mixing with the crust.
Making the Cheesecake Filling
The cheesecake filling is the heart of your mini cheesecakes, and achieving a smooth consistency is key. Begin by using an electric mixer to beat the cream cheese until it’s creamy and free of lumps. This initial step is crucial, as it sets the foundation for a velvety filling.
Next, gradually incorporate the sugar, mixing well after each addition to ensure it’s fully dissolved. This method not only enhances the texture but also prevents overmixing, which can introduce unwanted air into the batter and lead to cracks as the cheesecakes bake. Once the sugar is combined, add in the eggs one at a time, blending just until incorporated. This gradual integration will help you maintain a smooth and rich filling.
Now, add the sour cream and vanilla extract, mixing until everything is well combined. If desired, this is also the time to include any flavor twists like lemon zest or chocolate chips, which can elevate your mini cheesecakes to the next level.
Filling the Crusts with Cheesecake Mixture
Filling the crusts with the cheesecake mixture requires a gentle touch to avoid overfilling. Using a spoon or a small ladle, carefully fill each crust to about three-quarters full. This allows room for the cheesecake to rise slightly during baking without spilling over.
To ensure even distribution, you can tap the muffin tin lightly on the counter to settle the filling. If you’re using a piping bag, this can also help you achieve a neat and controlled filling process.
Baking the Cheesecakes
When it comes to baking your mini cheesecakes, the optimal time is typically around 18-22 minutes. Keep a close eye on them as they approach the 18-minute mark. The cheesecakes should appear set around the edges but slightly jiggly in the center. This slight jiggle is a good sign that they are perfectly baked, as they will continue to set while cooling.
To prevent cracks during the cooling process, it’s essential to avoid rapid temperature changes. Turn off the oven and leave the door slightly ajar for about 10-15 minutes after baking. This gradual cooling allows the cheesecakes to stabilize and reduces the chance of cracking.
Cooling and Chilling: The Waiting Game
Once your mini cheesecakes are baked to perfection, it’s time for cooling and chilling. First, remove them from the oven and let them cool in the muffin tin for about 30 minutes at room temperature. After this initial cooling period, transfer them to the refrigerator to chill for at least 2-4 hours, or ideally overnight.
This chilling phase is crucial for flavor development and texture. The flavors meld together beautifully, and the cheesecakes firm up, making them easier to remove from the tins and ensuring they hold their shape when plated.
Adding the Perfect Toppings
Toppings can enhance your mini cheesecakes, providing an additional layer of flavor and visual appeal. Here are some delightful options to consider:
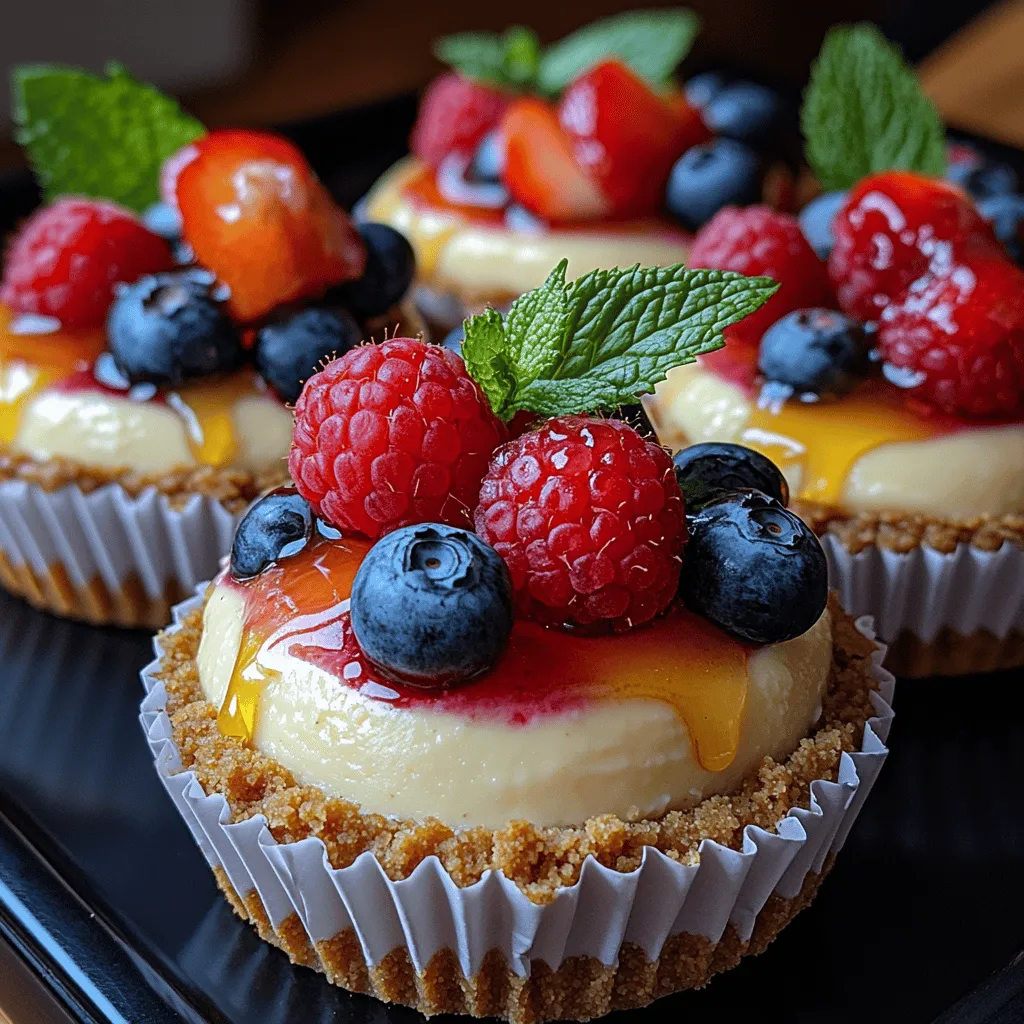
– Fresh Berries: Strawberries, blueberries, or raspberries add a burst of flavor and vibrant color. You can arrange them on top of each cheesecake just before serving.
– Honey or Maple Syrup: Drizzling a bit of honey or maple syrup over the cheesecakes adds a touch of natural sweetness that complements the creaminess of the filling.
– Mint Leaves: A sprig of fresh mint not only adds a pop of green but also a refreshing note that balances the richness of the cheesecake.
Feel free to mix and match toppings based on your preferences or the season. The possibilities are endless!
Serving Suggestions
Presentation is key when it comes to serving your mini cheesecakes. Here are some ideas to elevate the visual appeal:
– Plating Techniques: Serve the mini cheesecakes on elegant dessert plates. You can garnish the plate with a drizzle of berry coulis or chocolate sauce for an artistic touch.
– Pairing Suggestions: Consider pairing your mini cheesecakes with a light dessert wine, coffee, or herbal tea. These beverages can enhance the overall experience and complement the flavors of the cheesecakes.
For an added flair, consider serving them on a tiered cake stand for a beautiful display, especially when hosting a gathering.
Nutritional Information
For those mindful of dietary considerations, here’s an overview of the nutritional content per mini cheesecake (based on standard ingredients):
– Calories: Approximately 150-200
– Total Fat: 10g
– Saturated Fat: 6g
– Carbohydrates: 15g
– Sugars: 8g
– Protein: 3g
Keep in mind that the nutritional values can vary based on specific brands and measurements used. Adjusting the recipe, such as using low-fat cream cheese or reducing sugar, can also alter these figures.
Conclusion
Mini cheesecakes with a twist offer a delightful combination of flavors and textures that make them a must-try dessert. With their easy preparation and customizable toppings, these treats are perfect for any occasion. By following this recipe, you can impress your guests or simply indulge in a delicious dessert. Enjoy the creamy goodness of mini cheesecakes, topped with fresh berries and a hint of sweetness, making every bite a moment of bliss.
Whether you’re serving them at a party, enjoying them during a cozy night in, or bringing them to a potluck, these mini cheesecakes are sure to be a hit. Embrace the versatility of this recipe and let your creativity shine through with unique flavors and toppings. Happy baking!
